
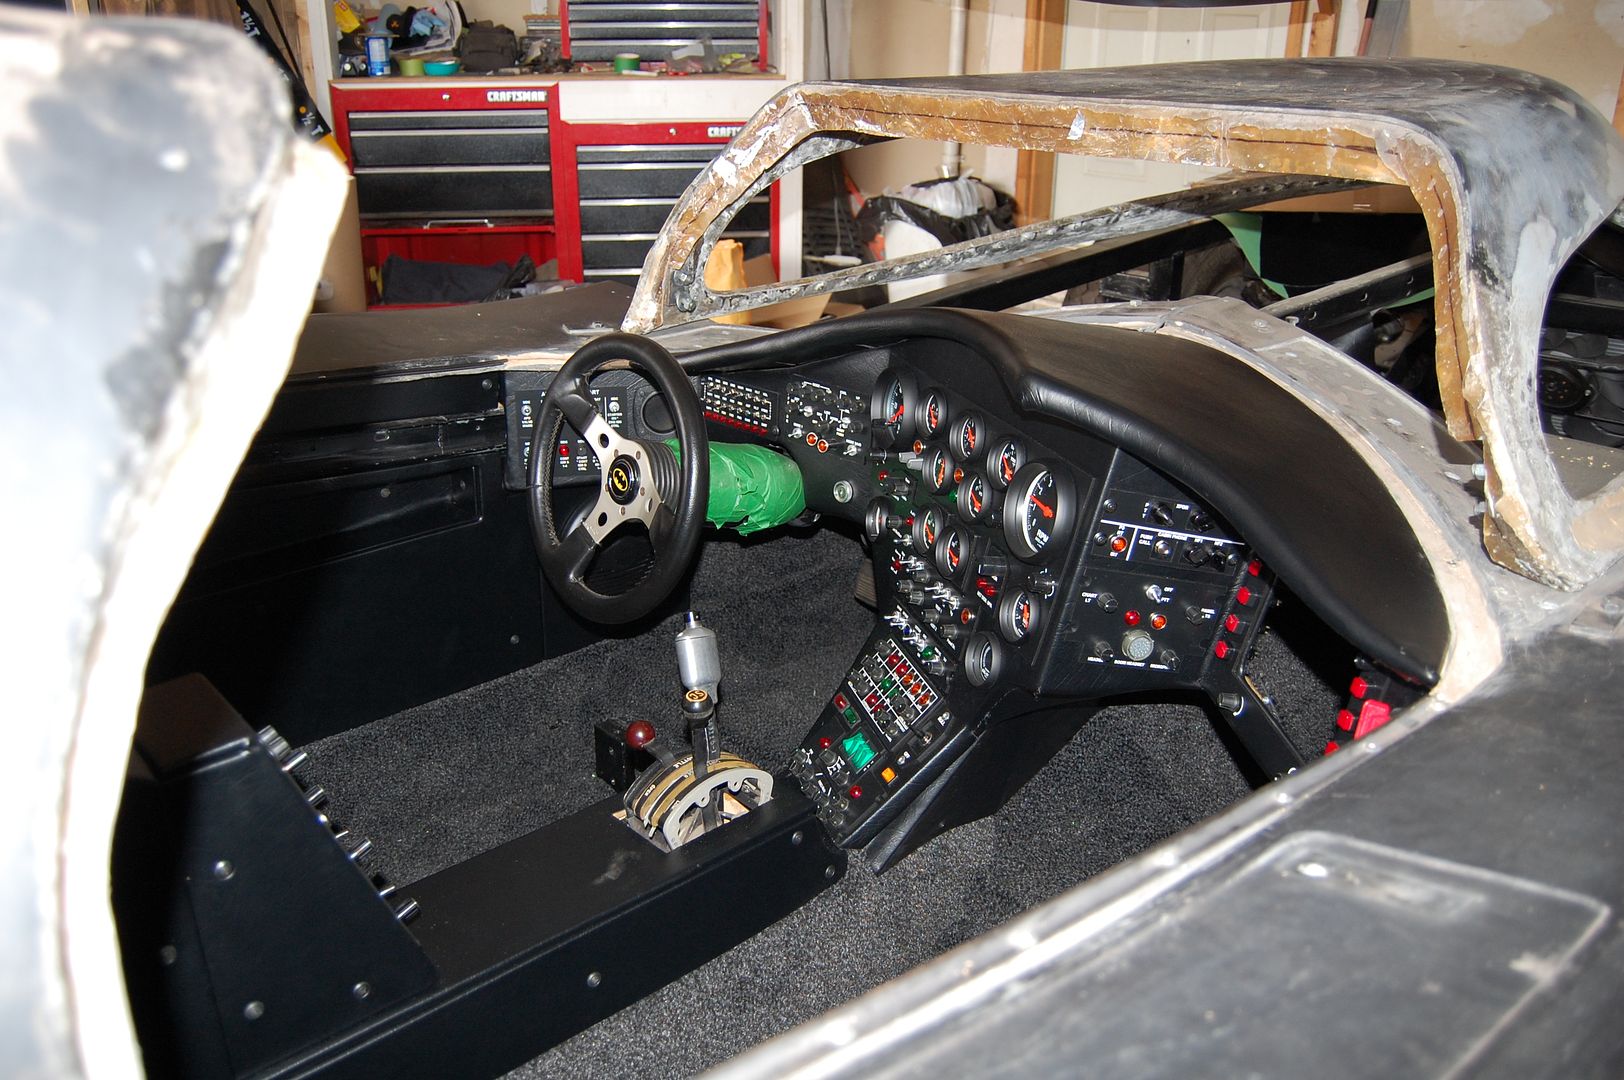
After many long years of working on this car I am really happy to now be at the point where the interior is complete and successfully fitted into the car 🙂
I can’t count the number of times that I’ve been in and out of this vehicle from starting with building the tube chassis, floor pans, driveshaft tunnel, firewall, and everything in-between. But now the interior is finally finished and I’m quite happy with how it turned out. The photos were the best I could get with the poor lighting of the garage. I definitely can say that you don’t want to drop anything black inside this car because it will be lost in a sea of black carpet and vinyl!
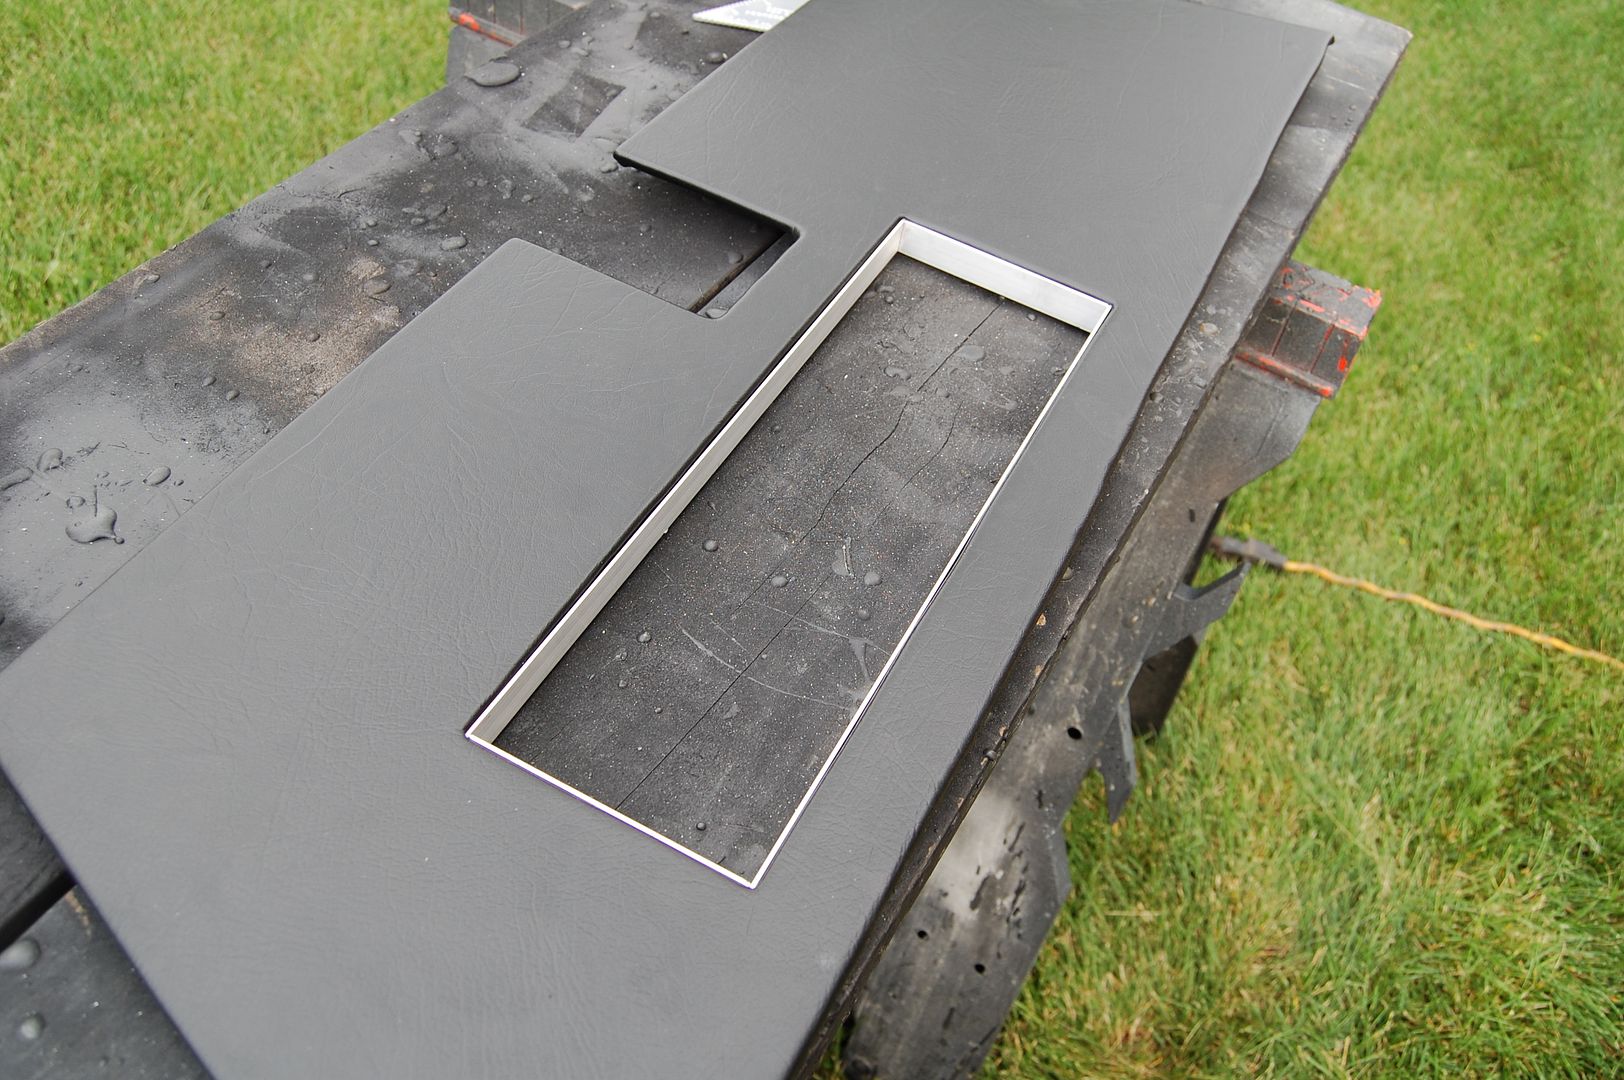
The only thing that’s left to do is send the seats out to be re-upholstered with black vinyl. Yes vinyl and not leather. I have to step onto the seats every time I get in and out of the vehicle so I want something that’s durable, I can wipe down, and that doesn’t make me wince every time I step on the seats. There were just a few items left from the last time I worked on the car that needed to be finished. Those were the dash lid, dash face and the center console.
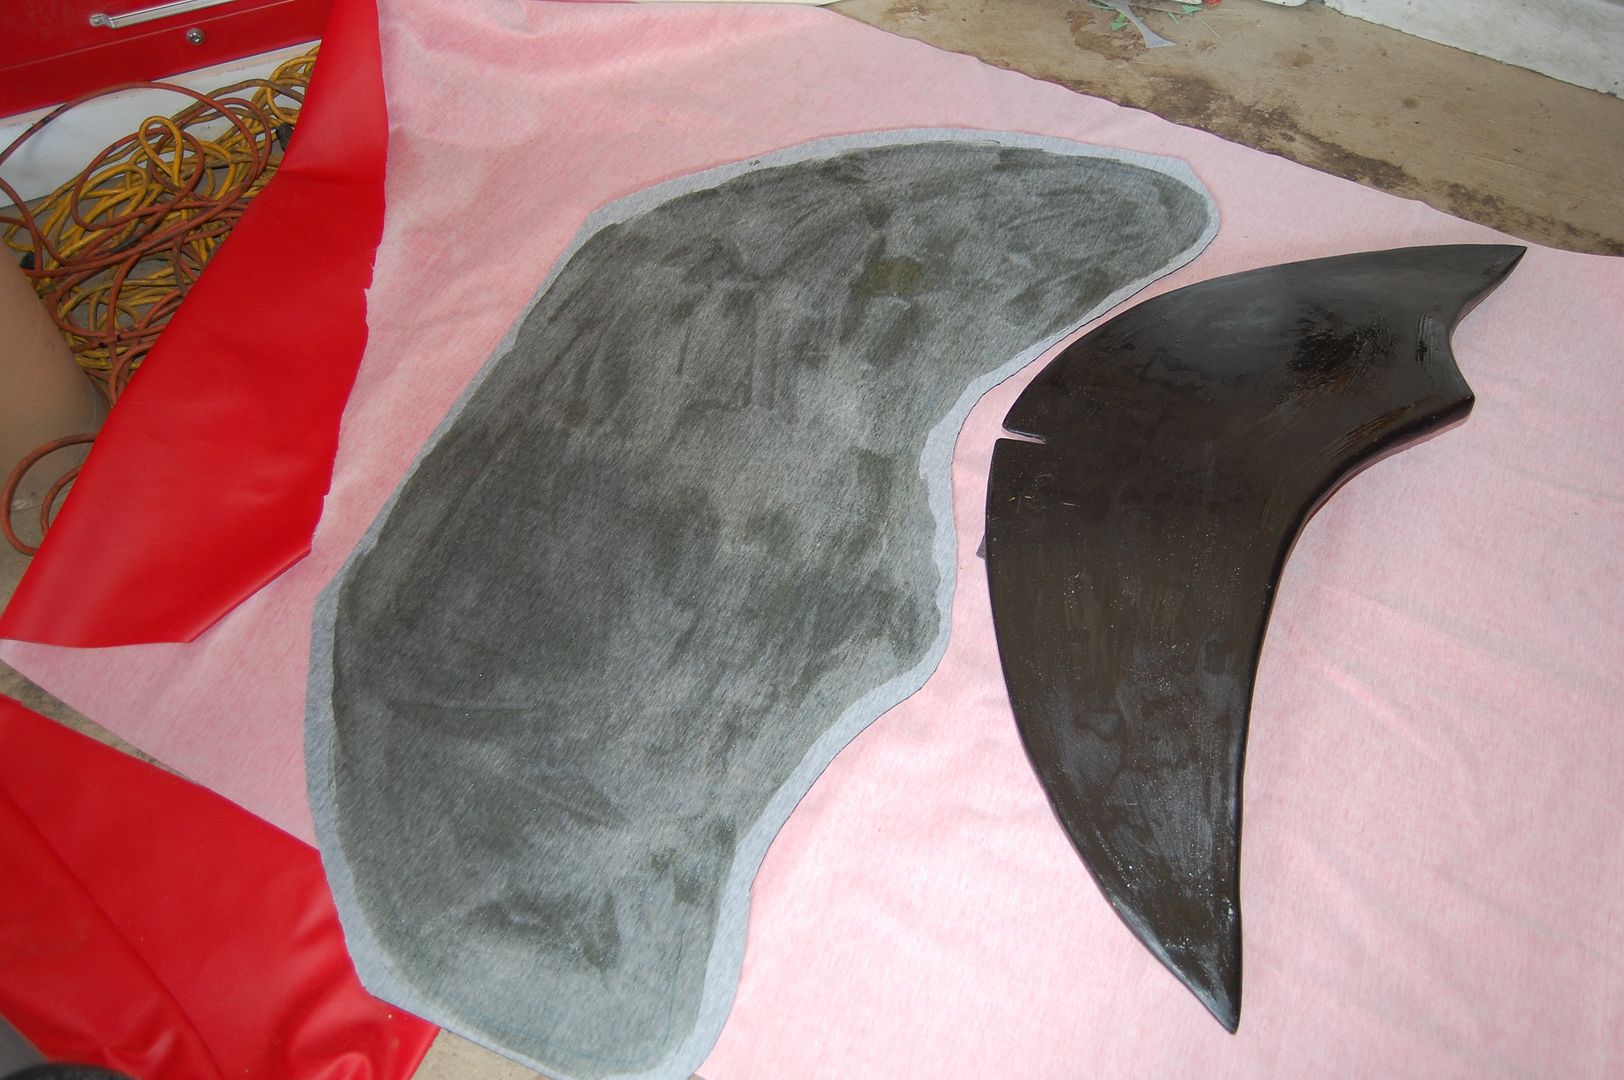

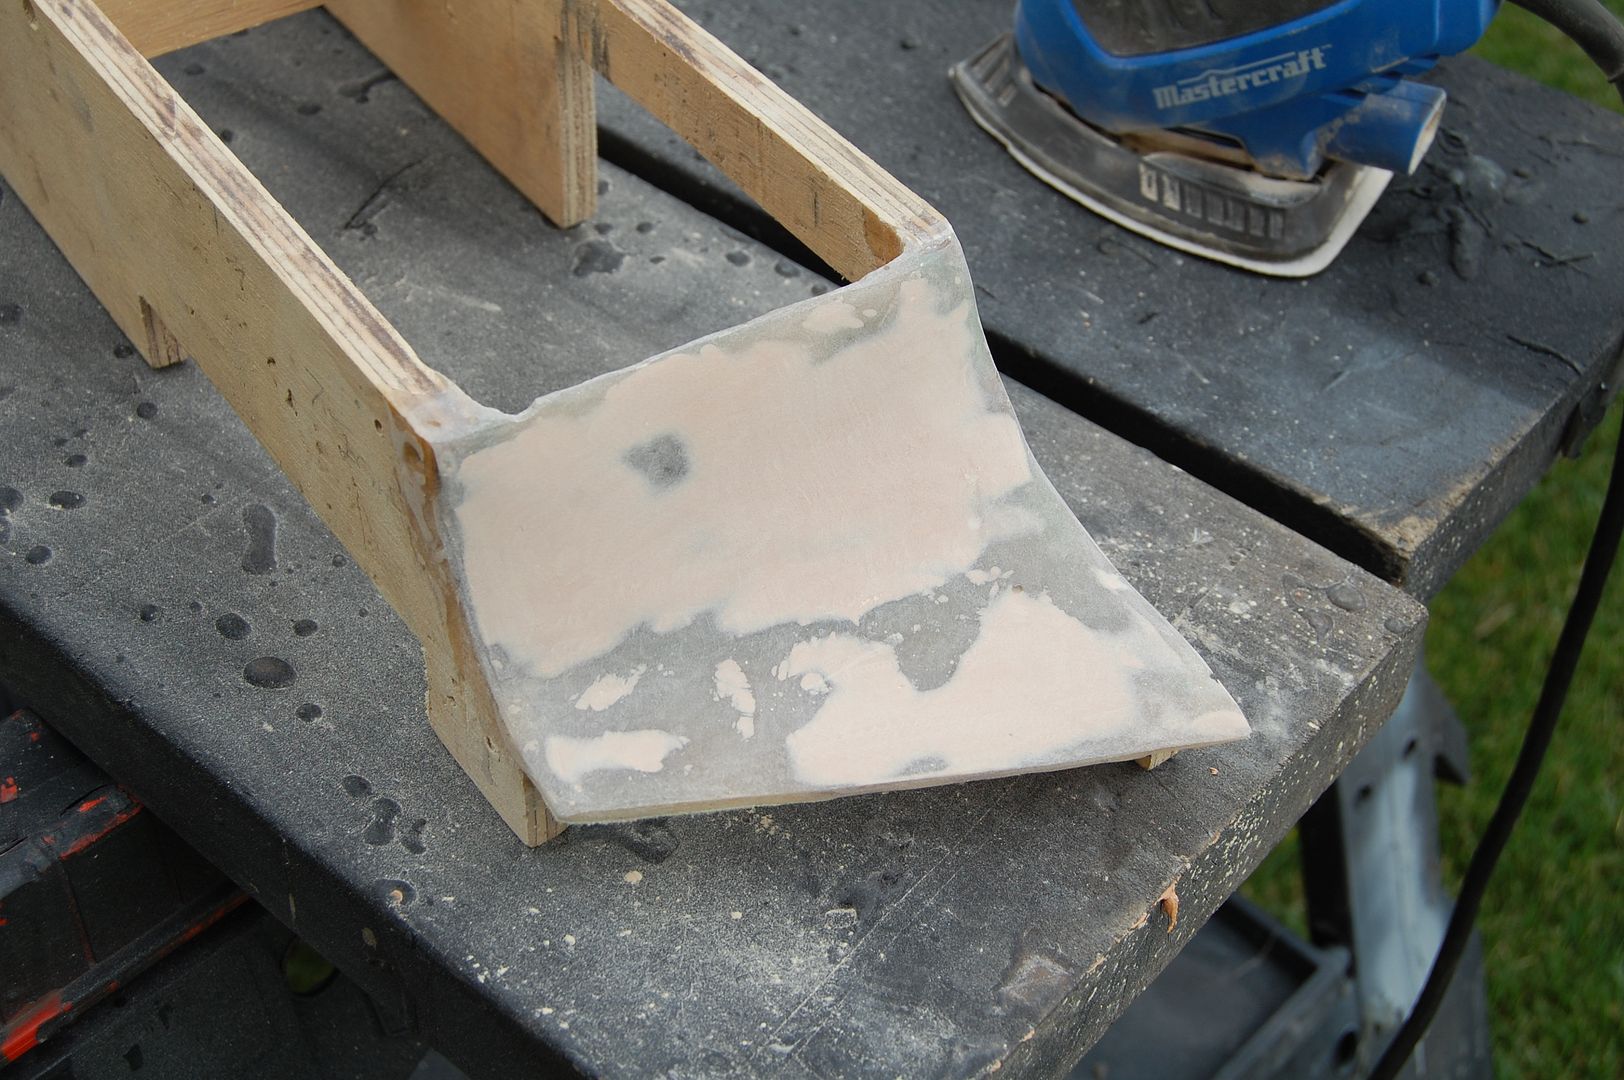
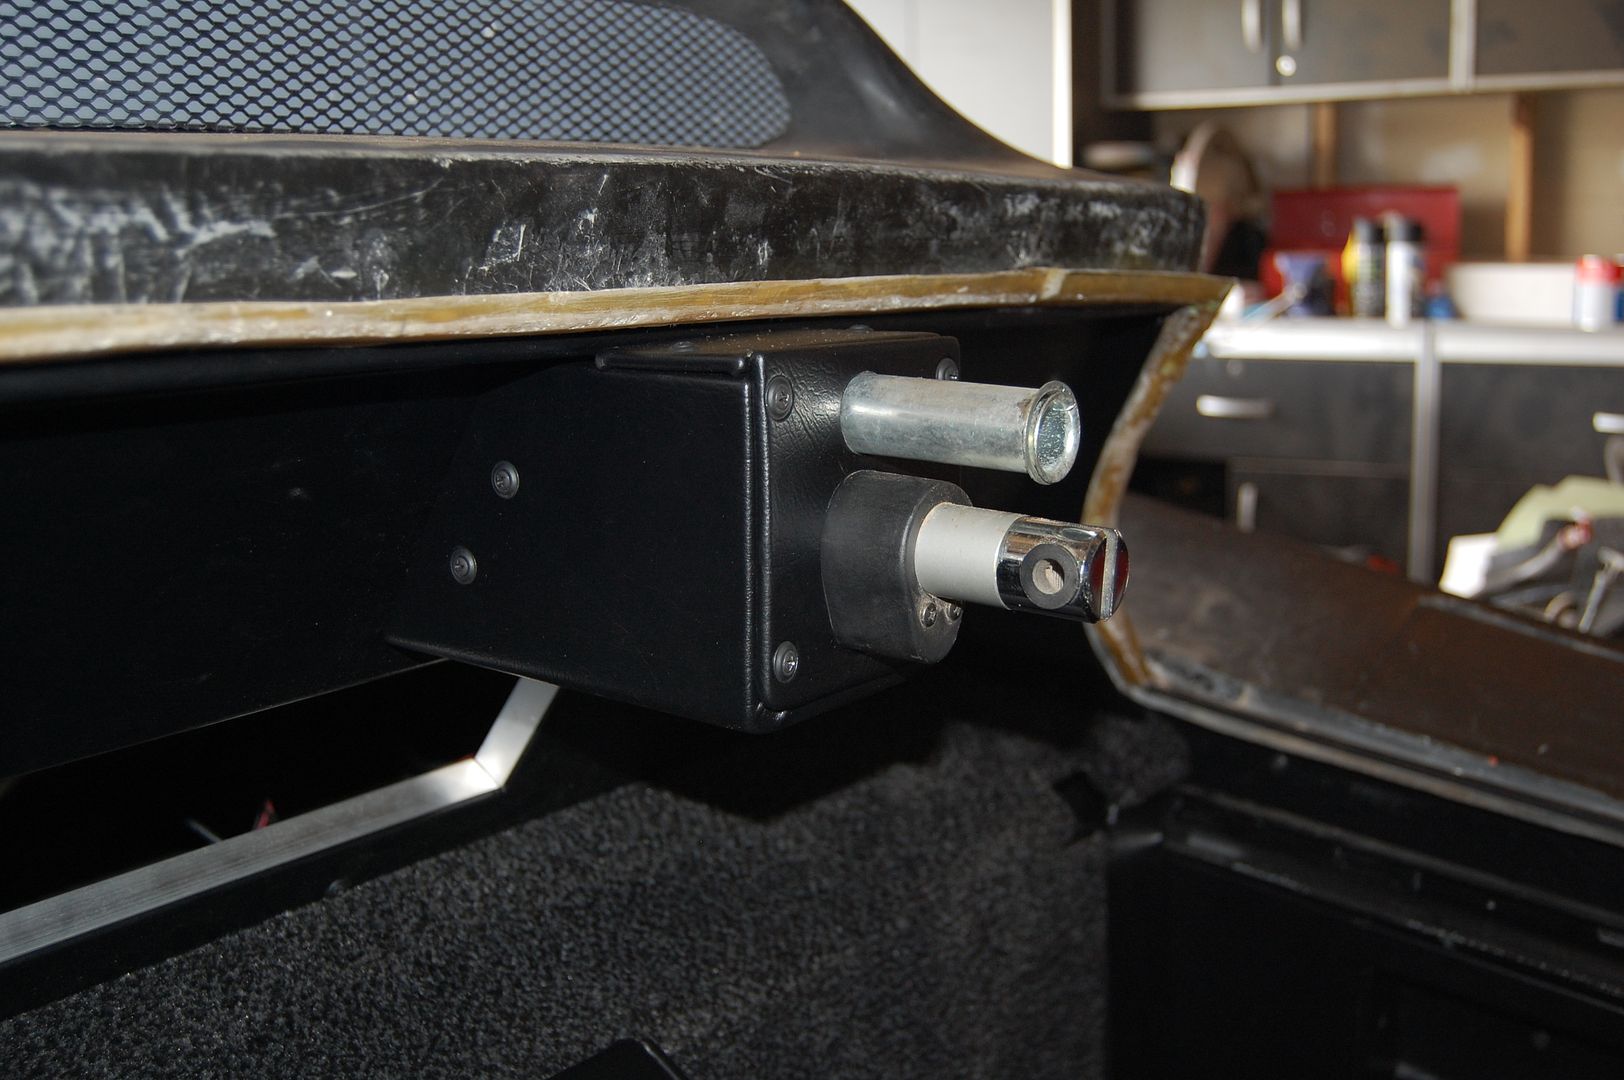
The dash lid took a little bit of work but came out fairly nice. I’ll likely eventually build a small trim panel to go on the underside where it meets the dash face just to make it nice and clean under there, but for now it will do just fine.
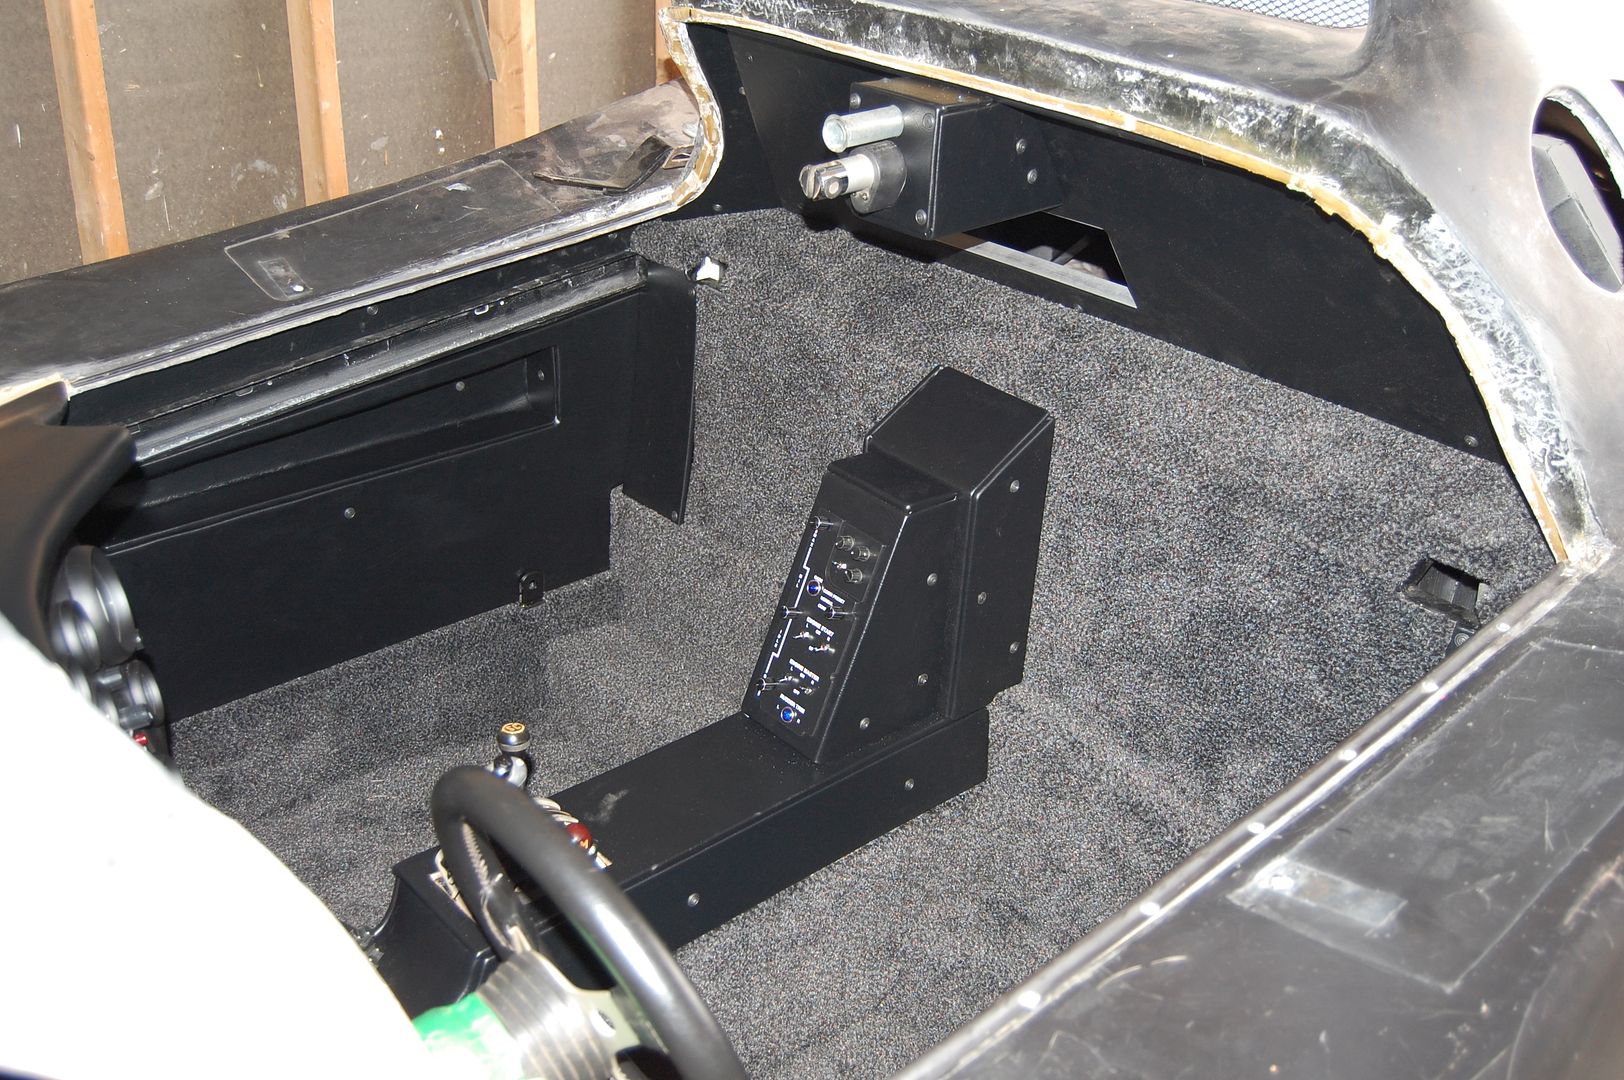
While the glue was drying I cut some pieces of 90 degree aluminium that will be placed on the inside edges of the rear wall that frame the rear switch panel. These will be painted flat black to go with the rest of the interior. I also created the vector art for the rear switch panel that will be created using the same process as the dash panels.

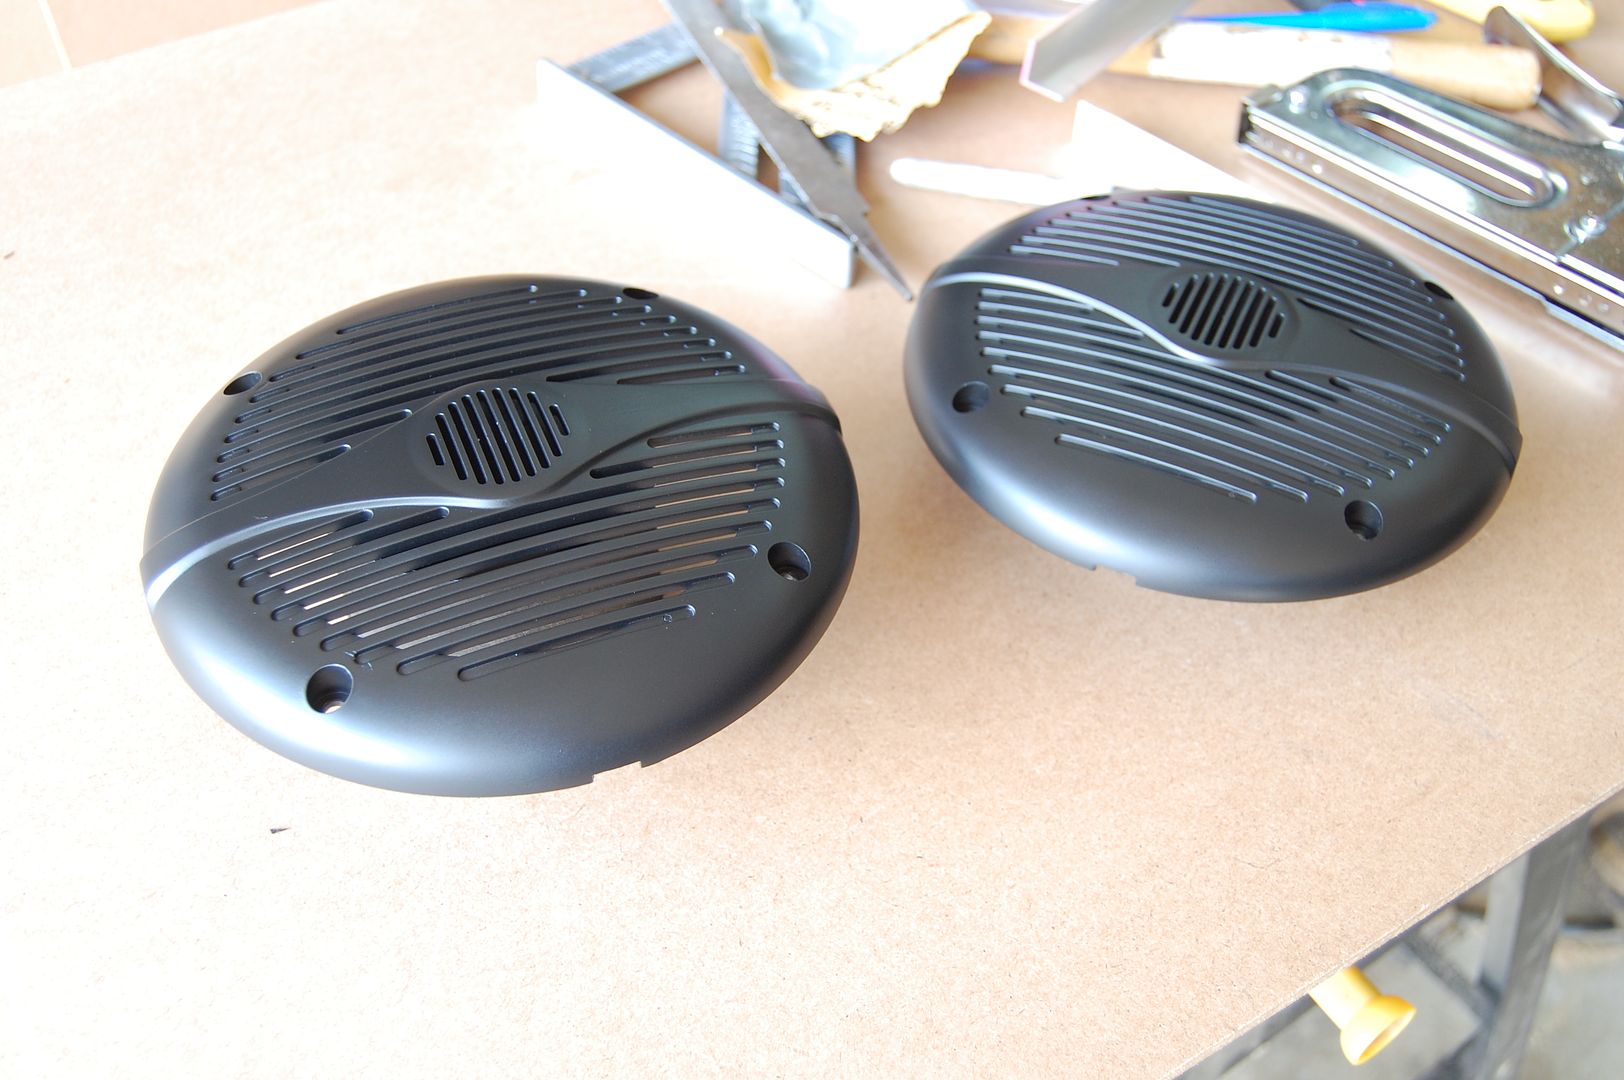
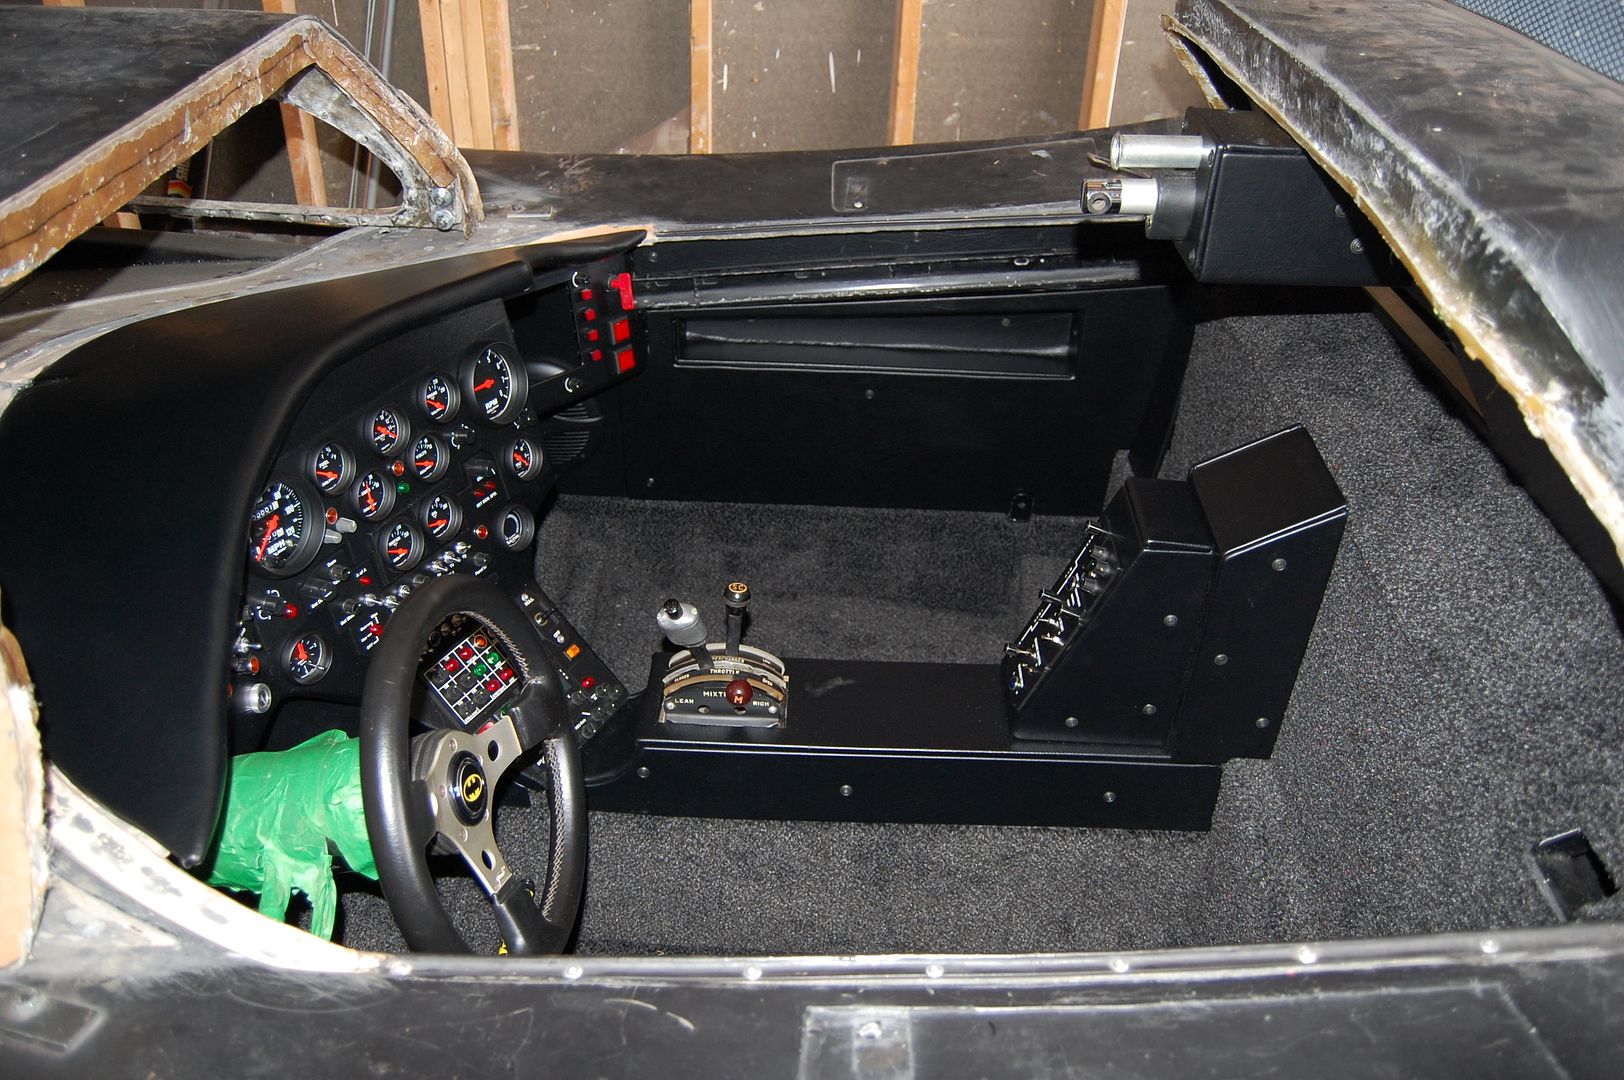
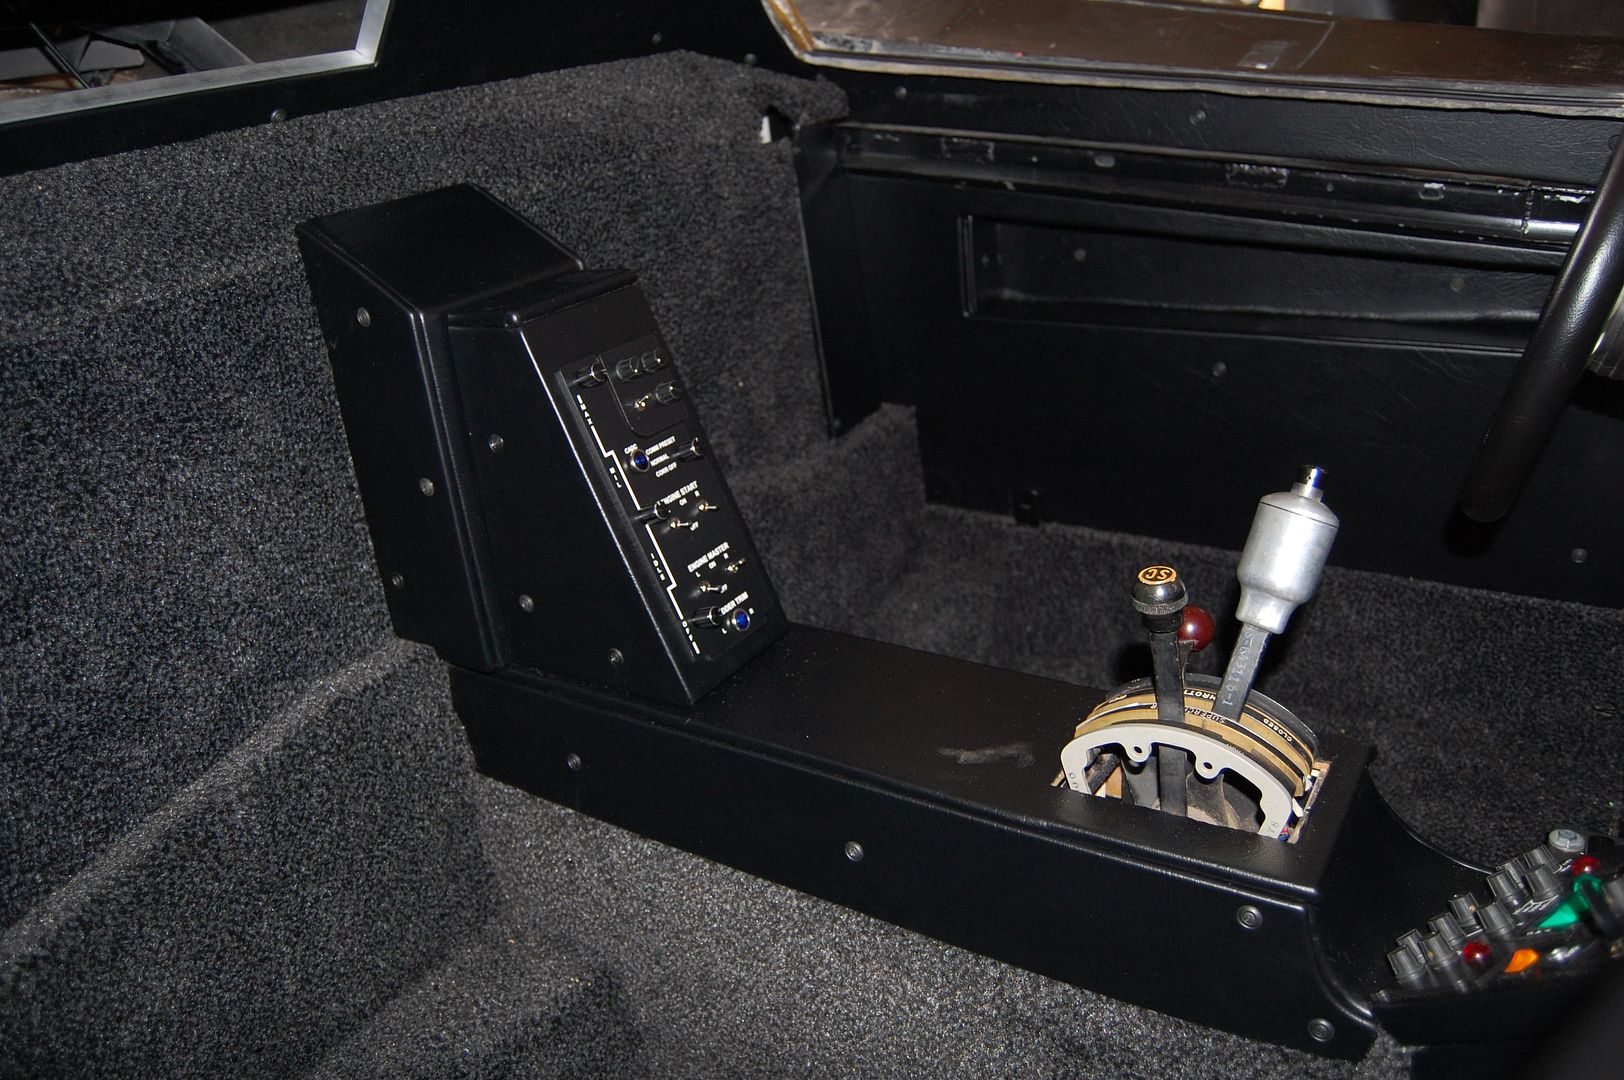
I also painted the speaker grills flat black to match the rest of the interior and gave the front curve of the center console some body filler and sanding. I wanted to make sure this was nice and smooth before gluing the vinyl.
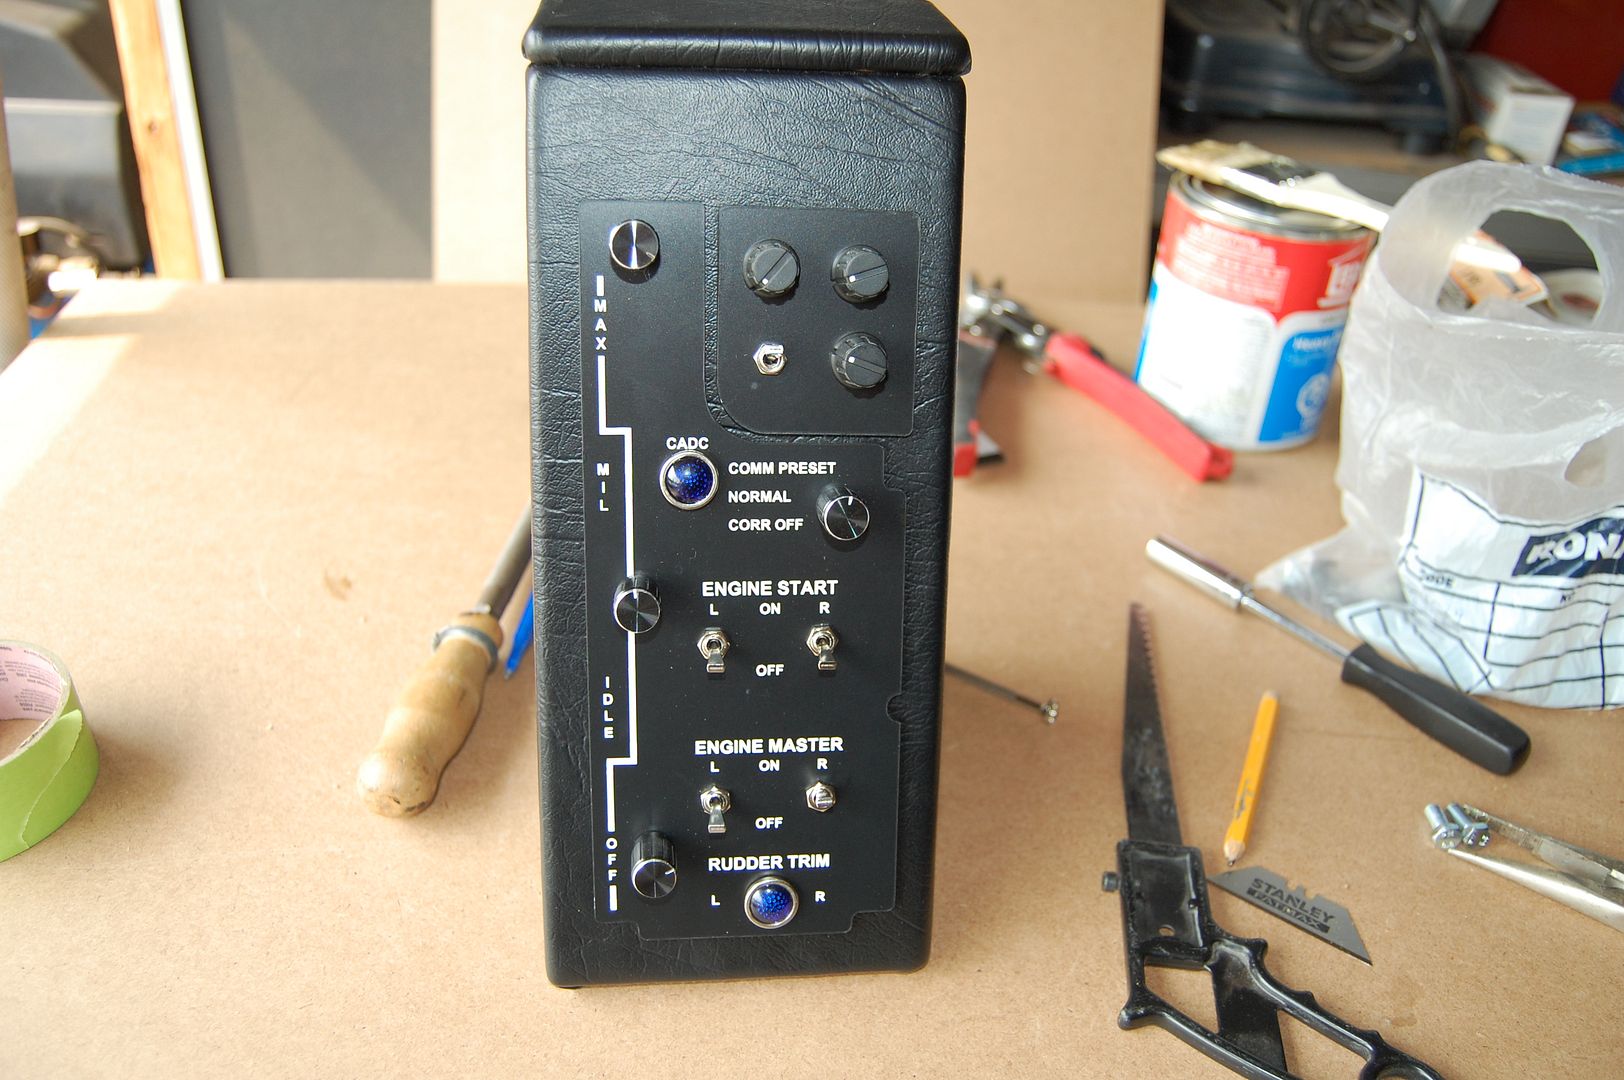
Once the center console was covered in vinyl I was able to fasten the trim panel, LEDs, switches and knobs to the rear console that goes between the two seats. This took a little extra trimming but turned out pretty darn nice.
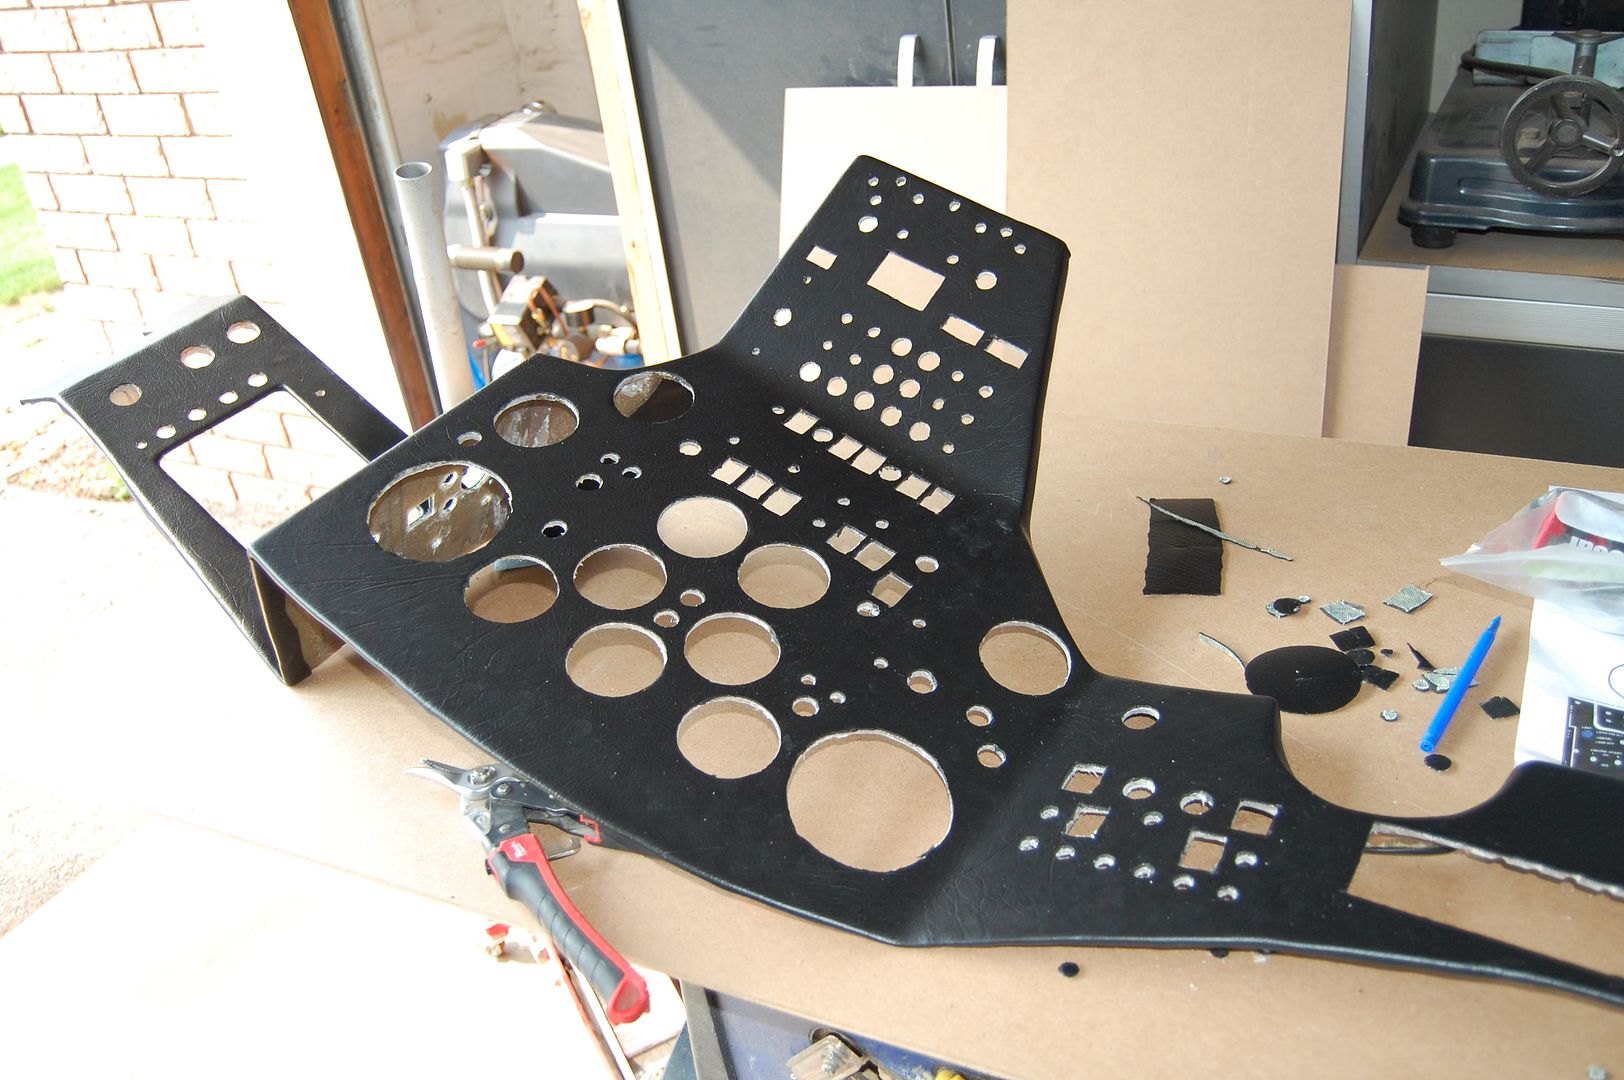
It was now time to cover the dash face with vinyl. This was one of the trickiest pieces to complete. I had to roll the vinyl on bit-by-bit and glue it in stages. That allowed me to make sure that everything was properly covered.
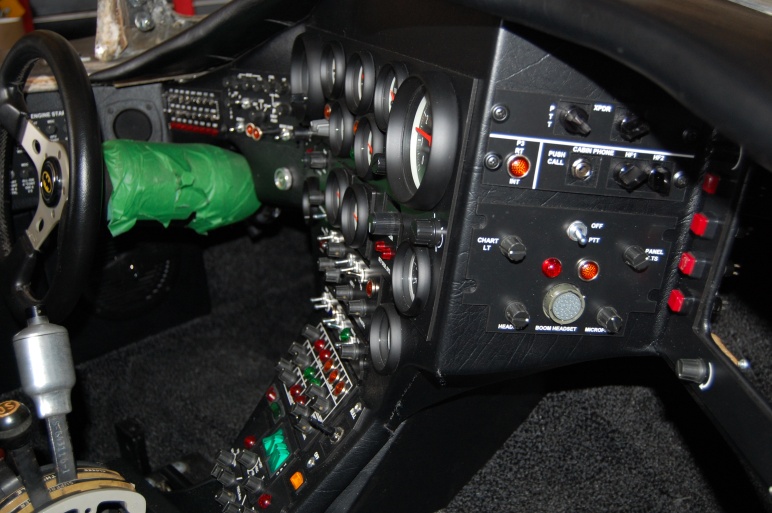
Then came the crazy part where every hole for a gauge, switch, dial, knob or LED needed to be cut out of the vinyl. I can tell you that there is a crap load of gadgets in this dashboard, so it took quite a bit of time fine tuning with a razor blade to trim all of these.
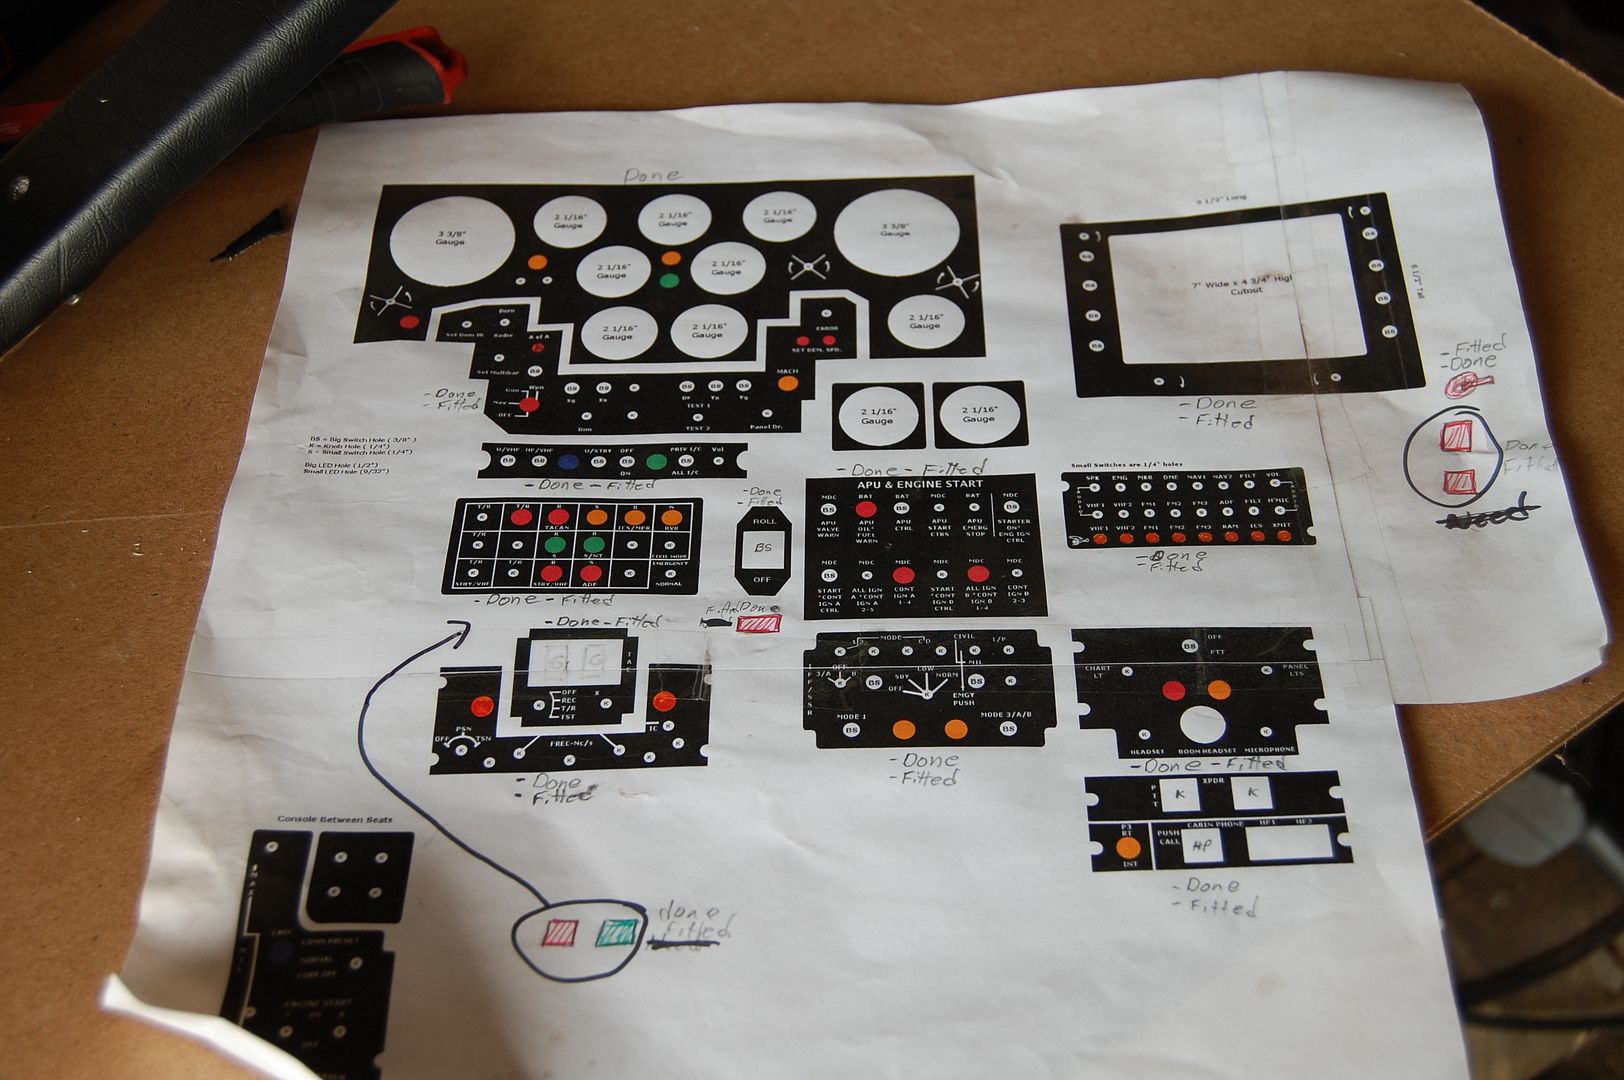
Out came the bags and bags of goodies to install into the dashboard. I’m really glad that I took the time to test fit all of these before getting to this stage. After putting in all that work to cover and trim the vinyl I would have hated to have to do major surgery on it.
All of the gadgets were bagged and labelled from last time and I had my trusty gadget map to help me remember were everything went.
A few hours later it was all installed and looking mighty fine! I did have one small moment of panic when I realized that I had always test fit the top dash lid first and then placed the dash face under it, but that wasn’t going to work when I need to do all the wiring behind the dashboard. I needed to install the face first and then the lid. But after I cut a couple small access holes to get a wrench onto the bolts for the dash lid we were good to go.
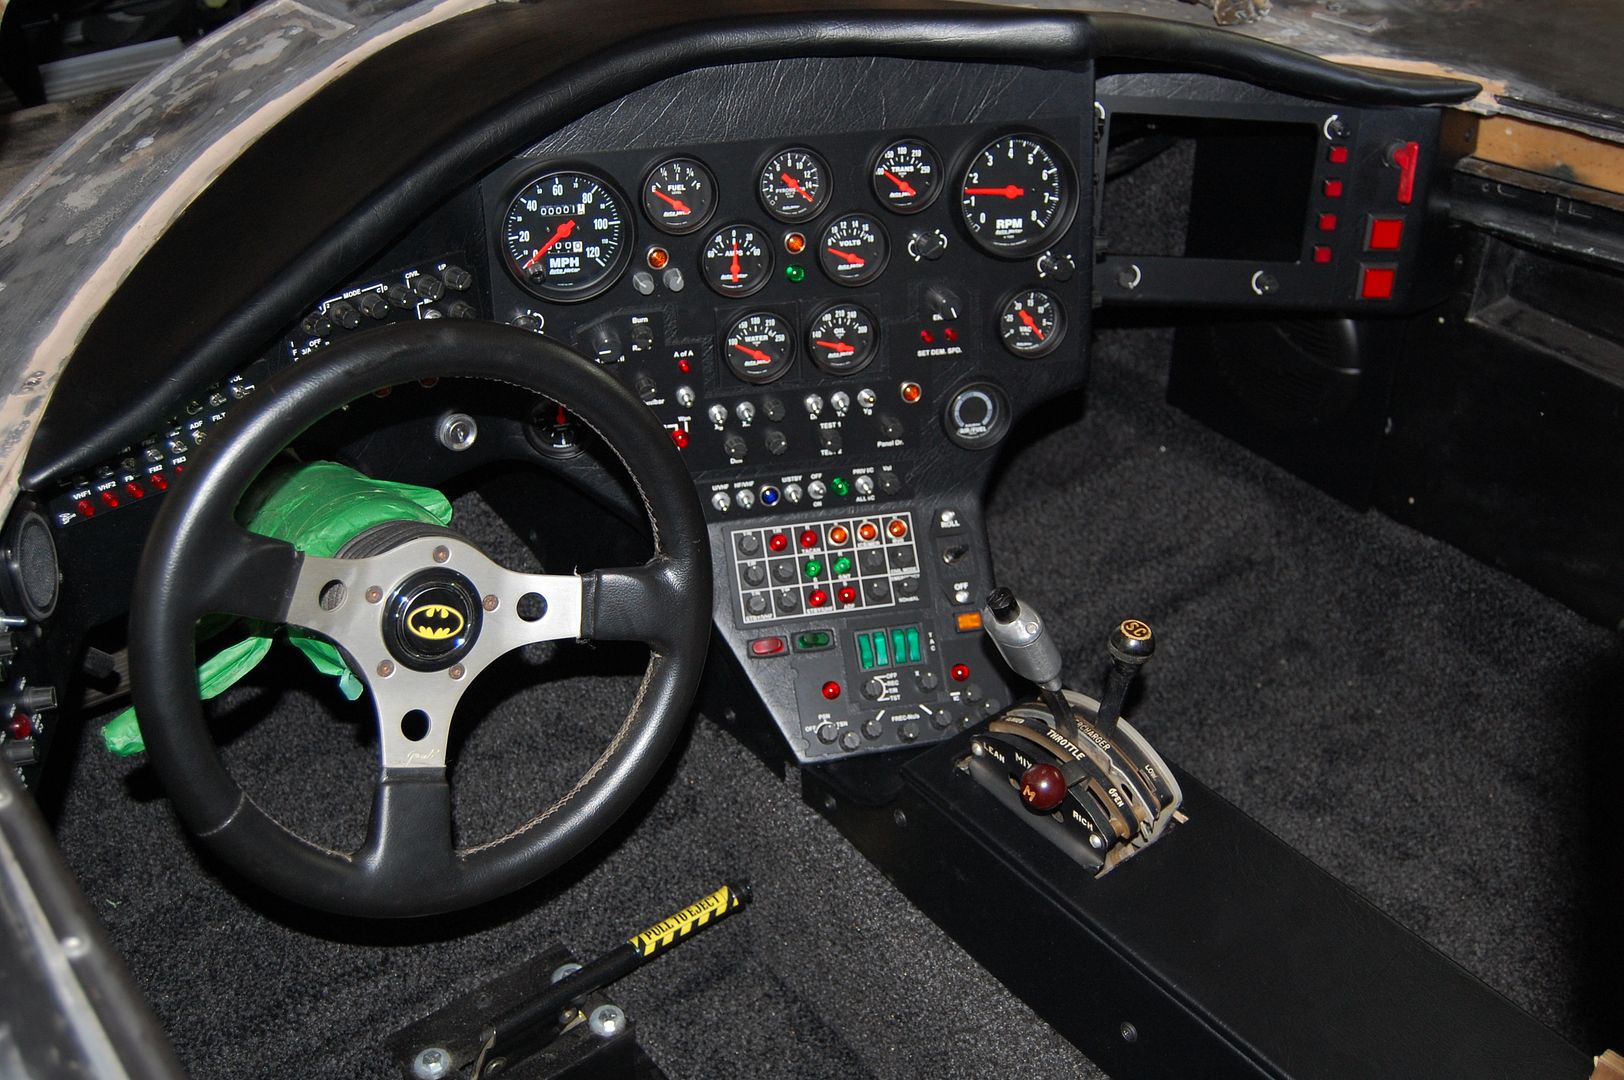
Now it was time to see if everything else still fit now that the dashboard and center console were installed. It’s amazing how much difference a layer of vinyl on both sides of a panel makes from the perspective of fitting. Let’s just say everything is definitely a snug fit 🙂
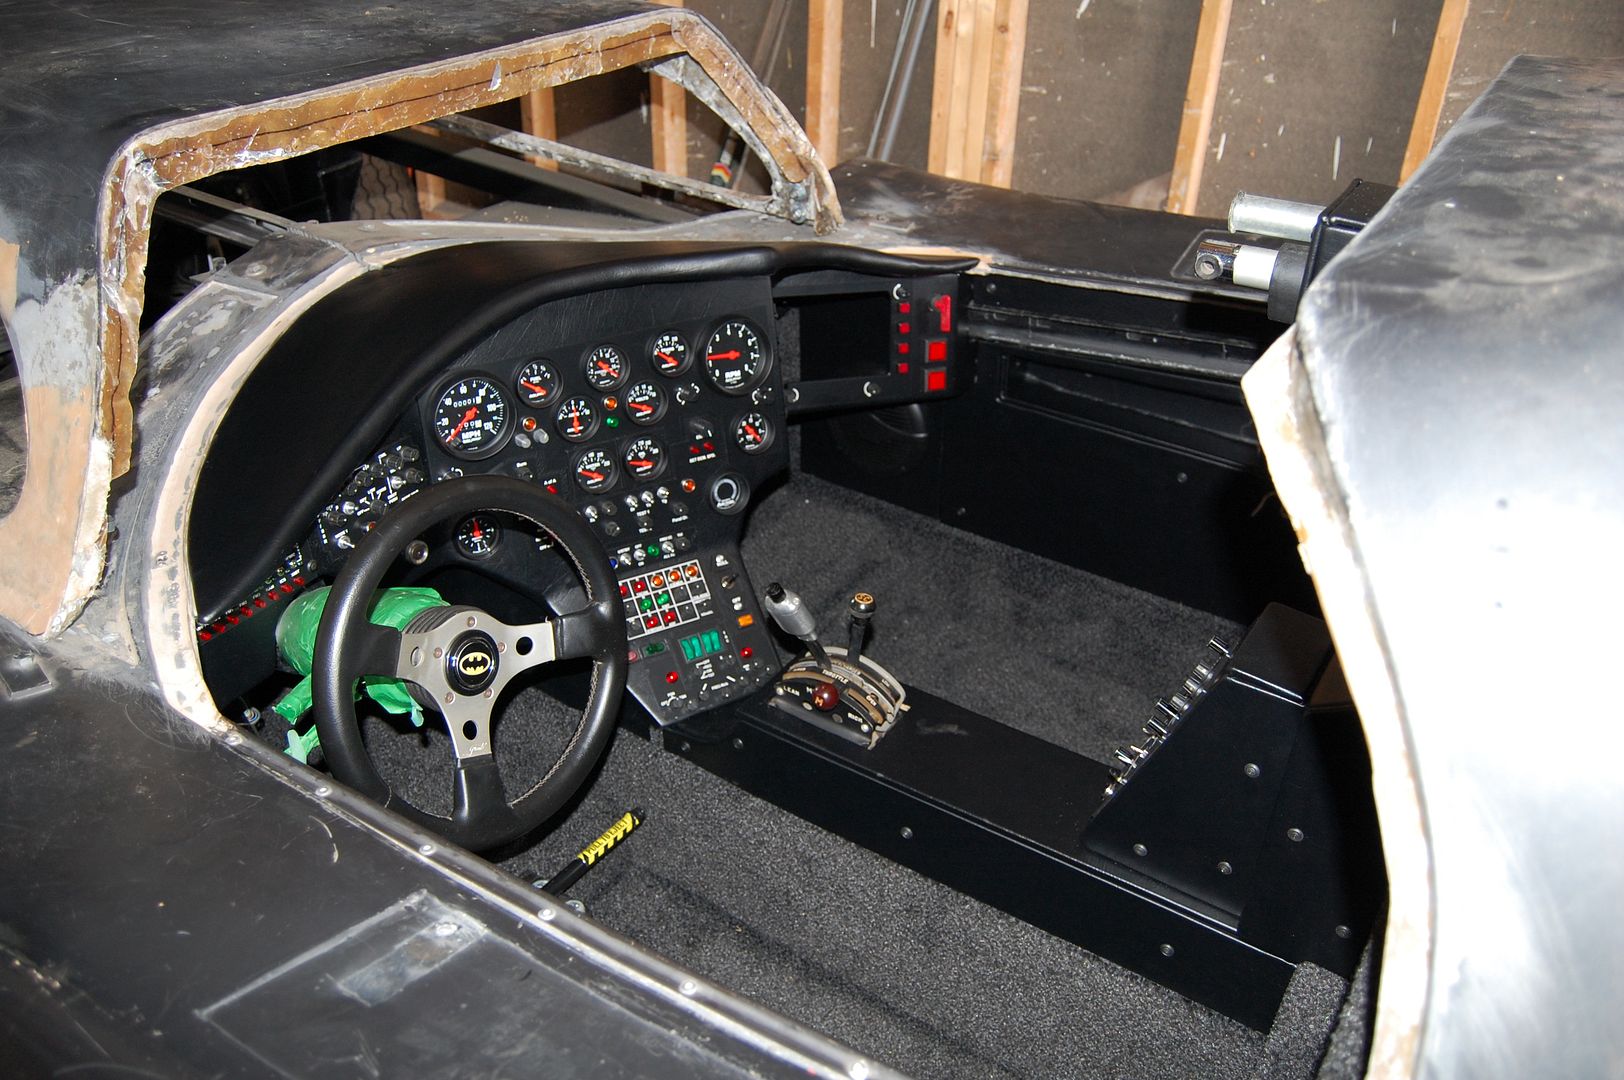
I’m really pleased with how it all turned out. It’s hard to tell from the pictures but it look so much better in person. My photography skills and lighting were not the greatest. The flash really washes out some things and makes others stand out.
The real funny part is that all of this interior now has to come back out so that I can finish the body work. I don’t want all that dust getting on the nice interior and I also don’t want to risk damaging it. I’ll be leaving it as-is for now just so that I can make sure I have the proper clearance between the canopy and the edge of the dashboard lid. Then it will all be coming out and put somewhere safe.
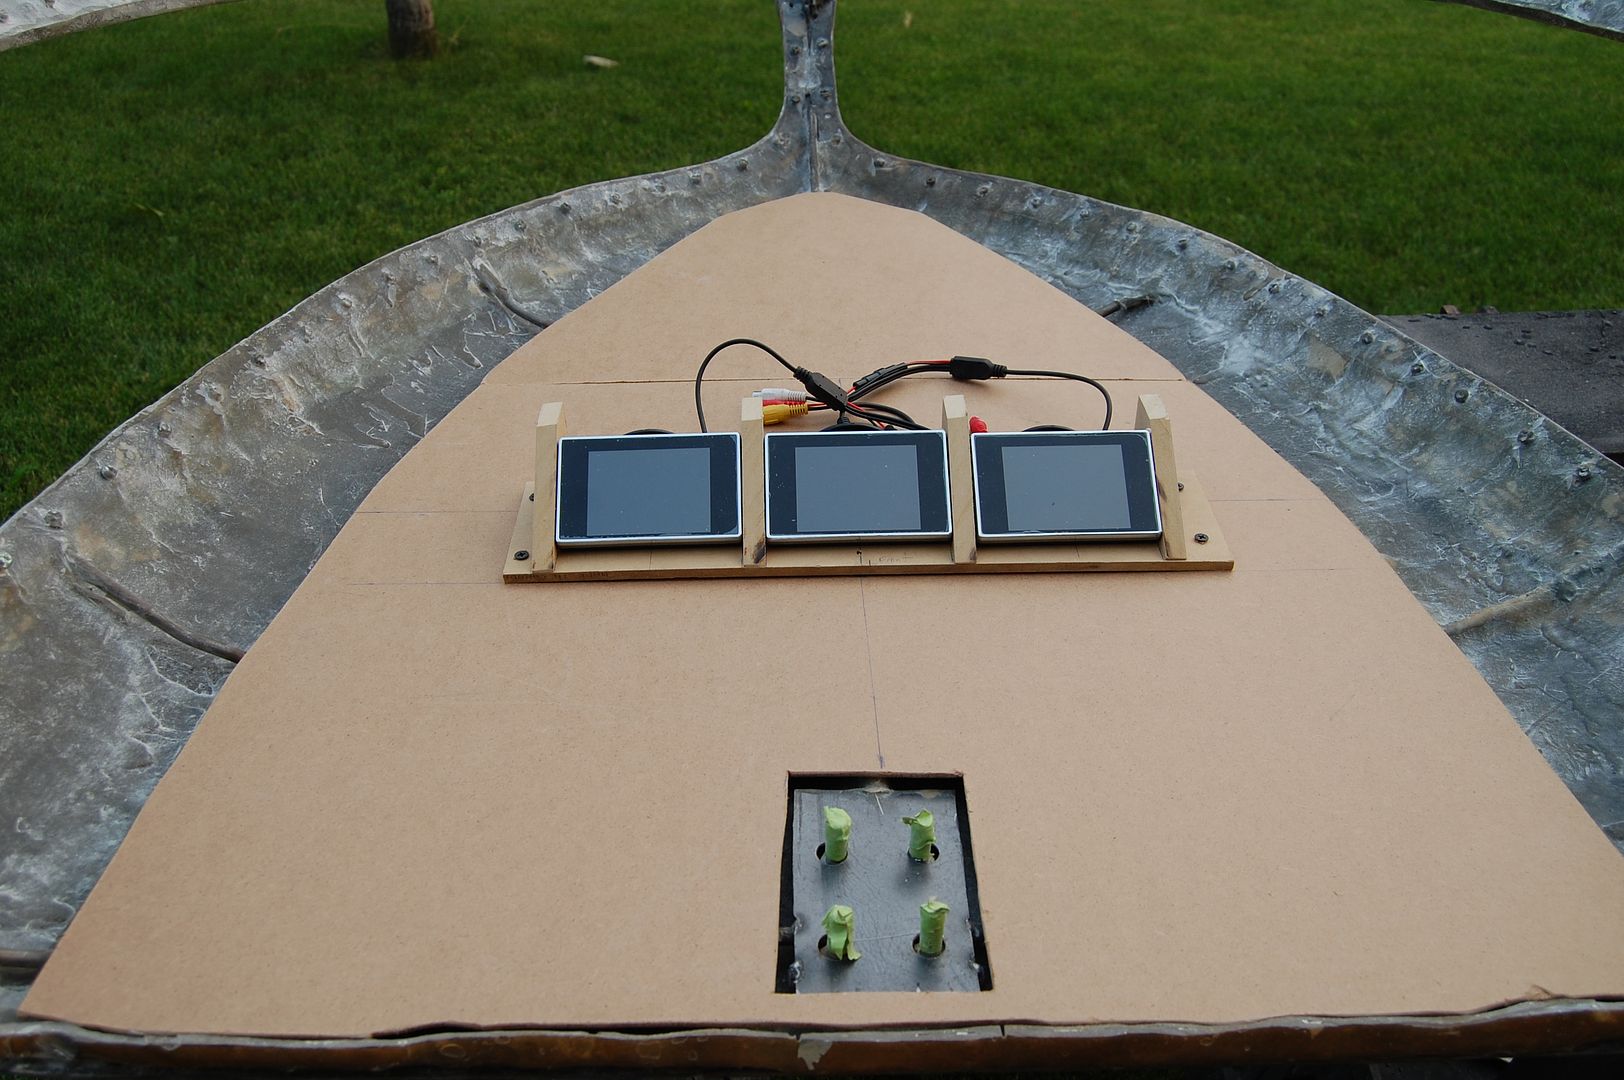
I was also able to get a start on the canopy work. Part of this work is to create an area on the ceiling for the monitors whichdisplay my two blind spots and rear view. The canopy is starting to get a little heavy so I’m opting for some 1/8″ hardboard to try and keep the weight down.
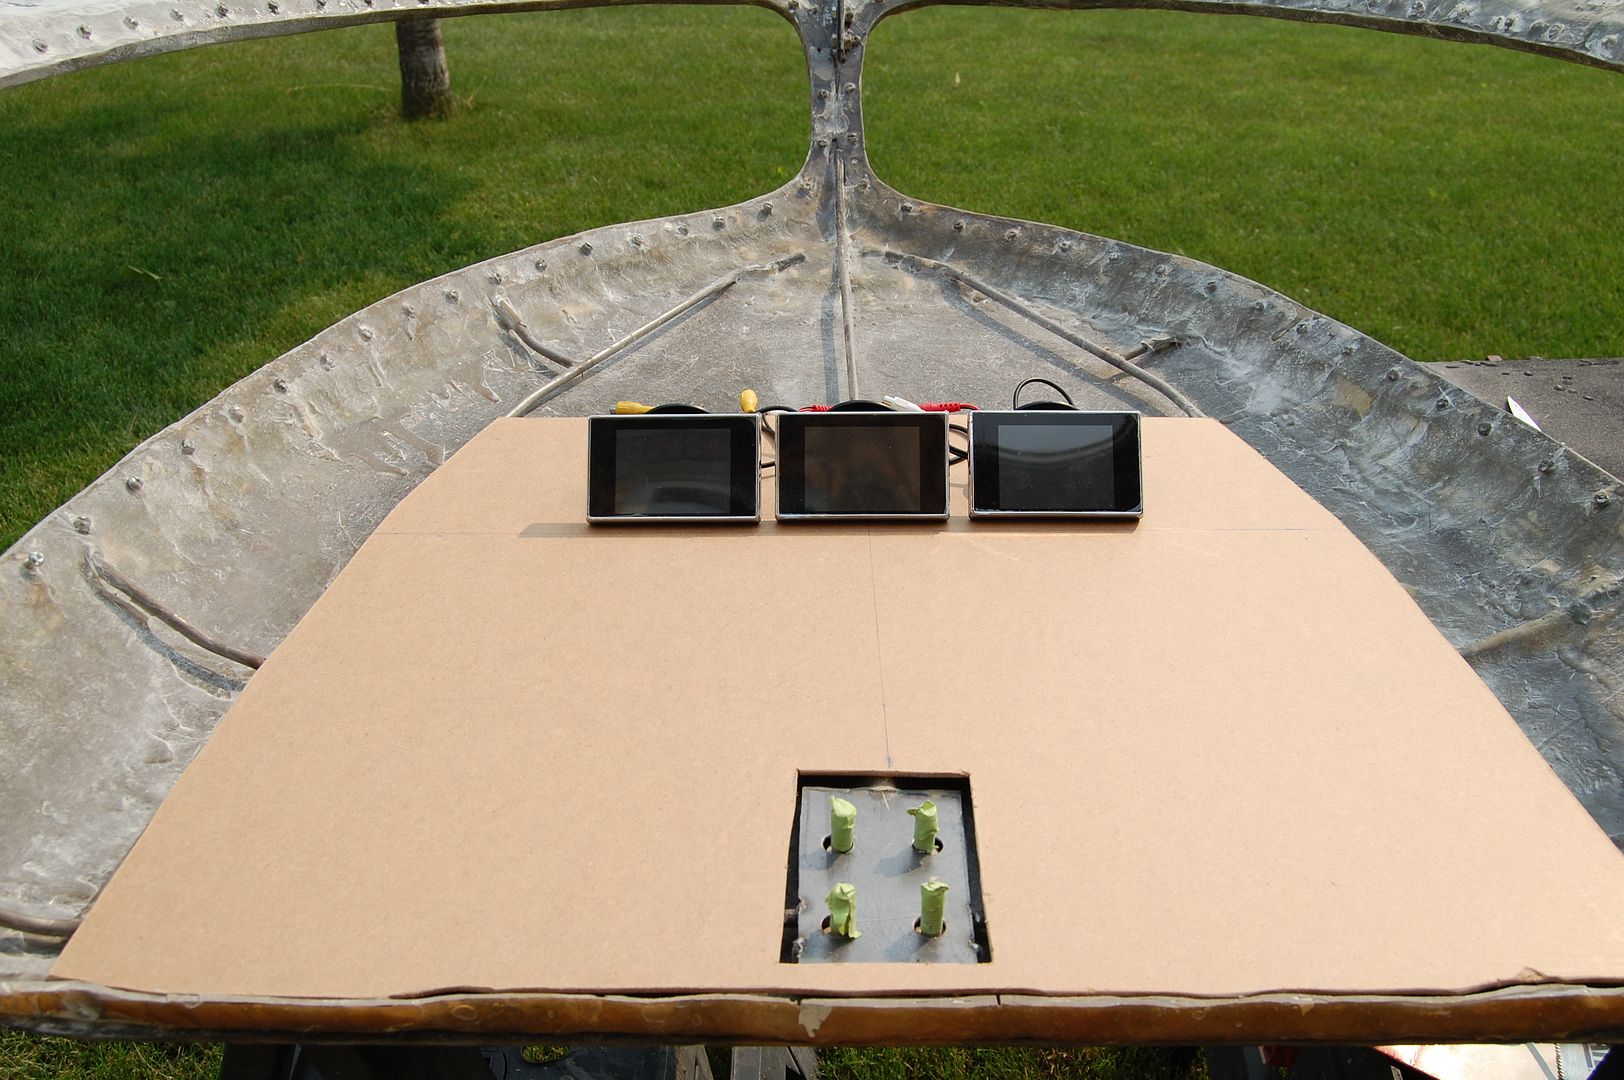
The ceiling will have a base for everything to attach to and then a mount for the monitors. I’ll likely also create a couple of switch panels for the ceiling so that it looks like the cockpit of a jet. You can see that I’ve started the mount for the monitors below. I need to tilt the monitors for better viewing when driving but I also need to keep the profile fairly low so that they don’t obstruct my view out of the already narrow front windshield.
I had to call it quits at this point. I was getting to exhausted to think straight so it was time to pack everything up. I did however get a nice visit from a neighbor who is a big Batman fan and happened across my build while out on a bike ride with his wife and child. We had a good old geeky Batman conversation to end the day. He had just bought the special edition 89 Batmobile Hot Wheels die-cast model and couldn’t believe how accurate the BatBerry was 🙂

Looks great you are really powering ahead
Thanks Craig! Yes, I want to drive this thing before the snow flies this year 🙂
It took me a moment to pick my jaw up off the keyboard. This latest update is just incredible.
Your attention to detail and endurance on this project are really paying off.
Cheers!
Ted.
Thanks Ted! It’s really nice to be finally working on finish work and not grinding off rust 🙂
Wow this looks great!
Thanks Dave 🙂 It looks even better in person.. couldn’t get the lighting right in the garage when I took the photos