

As I’ve been working on the dashboard I’ve known that there’s a finishing touch that needed to be added to the car. I’ve completed fabrication of the dash lid, and the dash face, but I hadn’t addressed the footwells yet.
If you look down in the footwells of your own car you’ll notice that you can’t see behind the dash and that there’s trim pieces that block off that area and hide all the nasty mess of wires behind your dashboard/console.
Now that I had my dash face securely mounted I needed to address this area in the BatBerry. I started with the driver’s side by mounting the dash face and then working with some bristol board material to template each of the pieces one by one and mounting them as I went along.
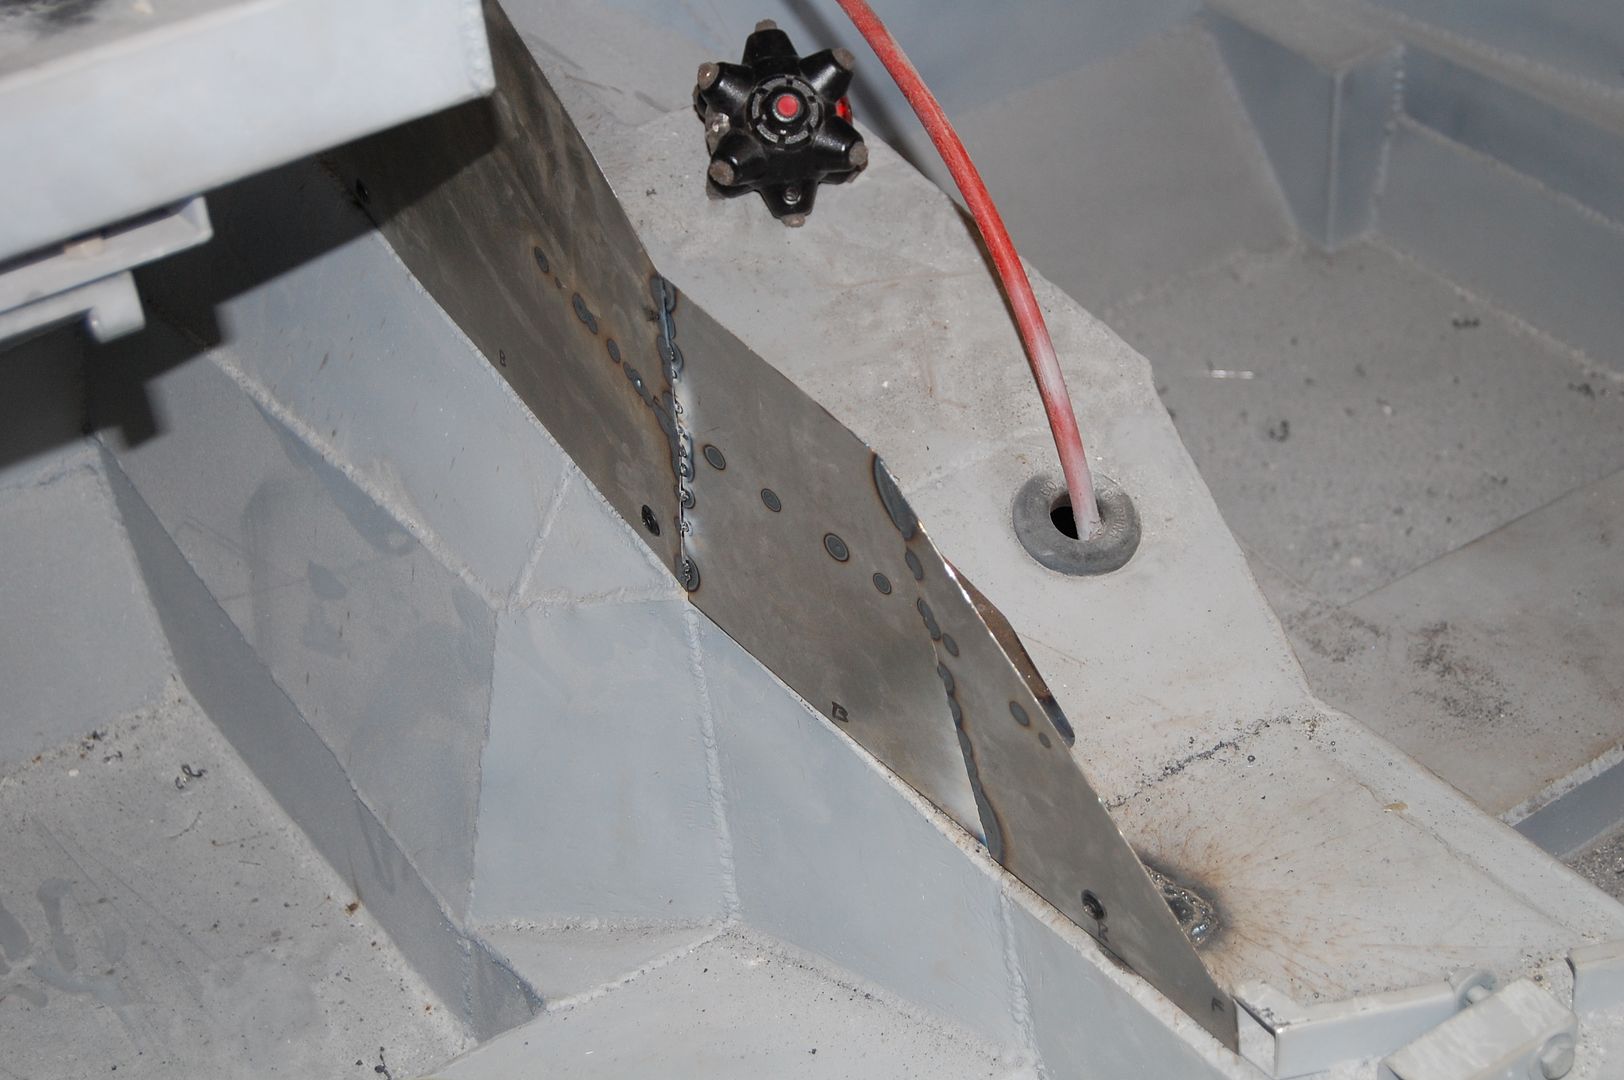
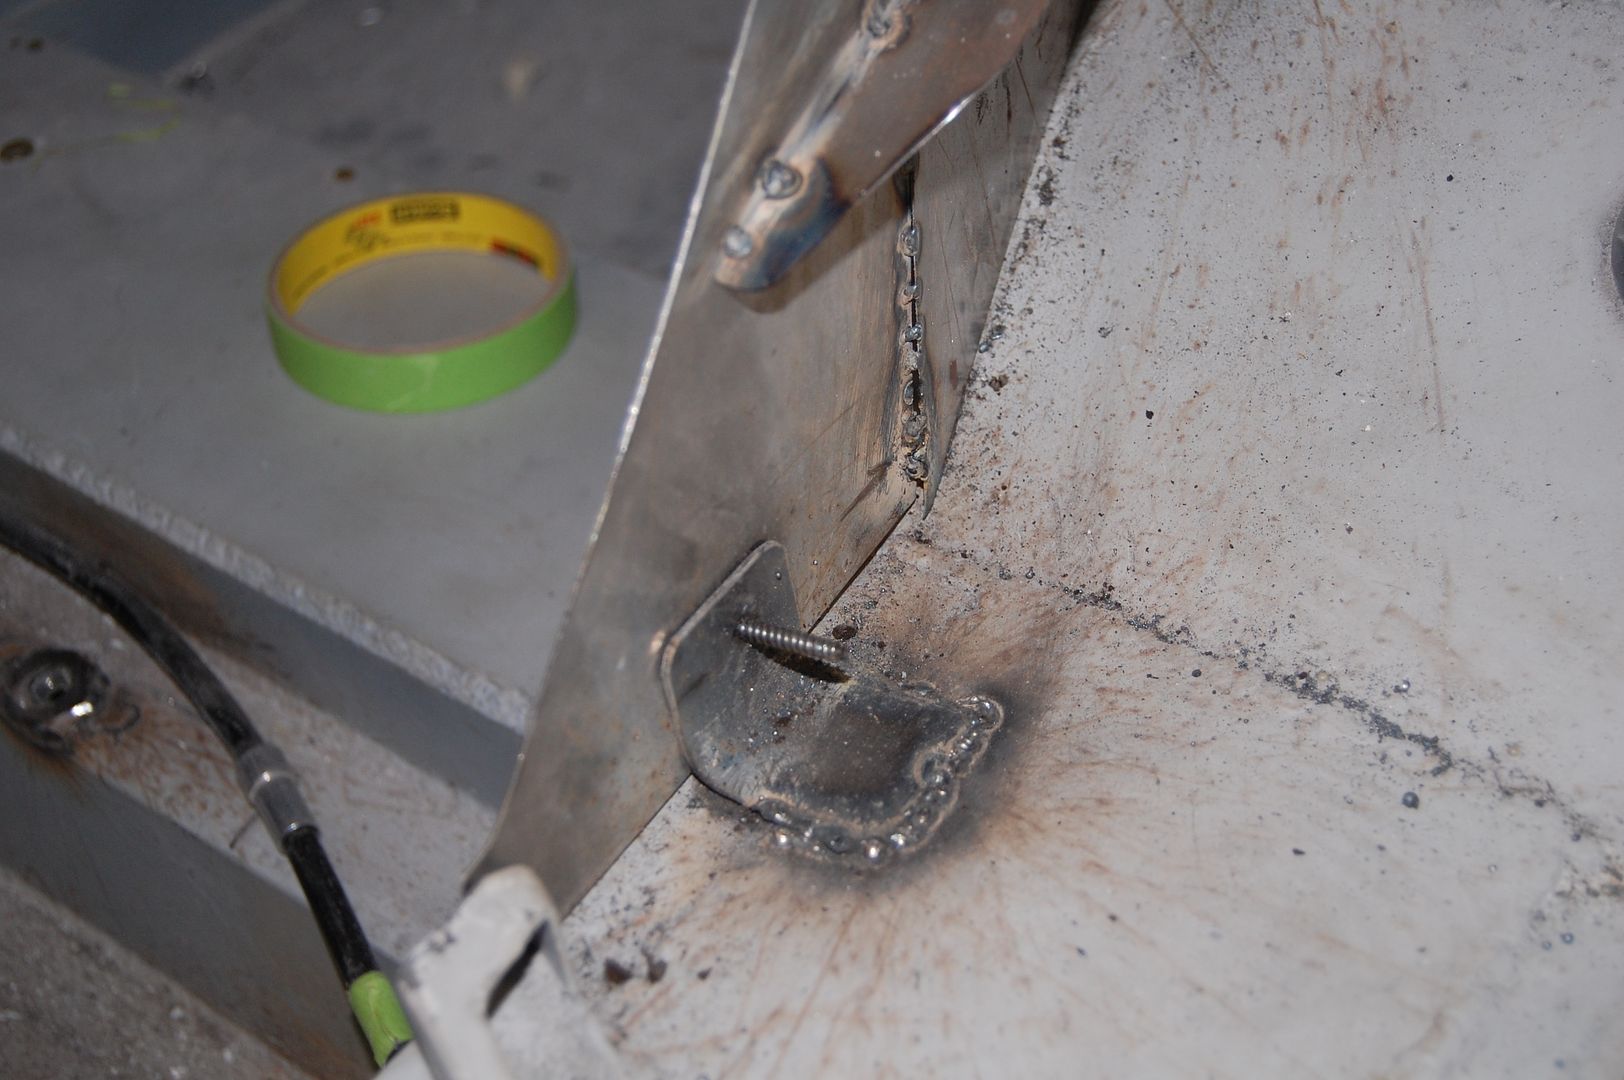
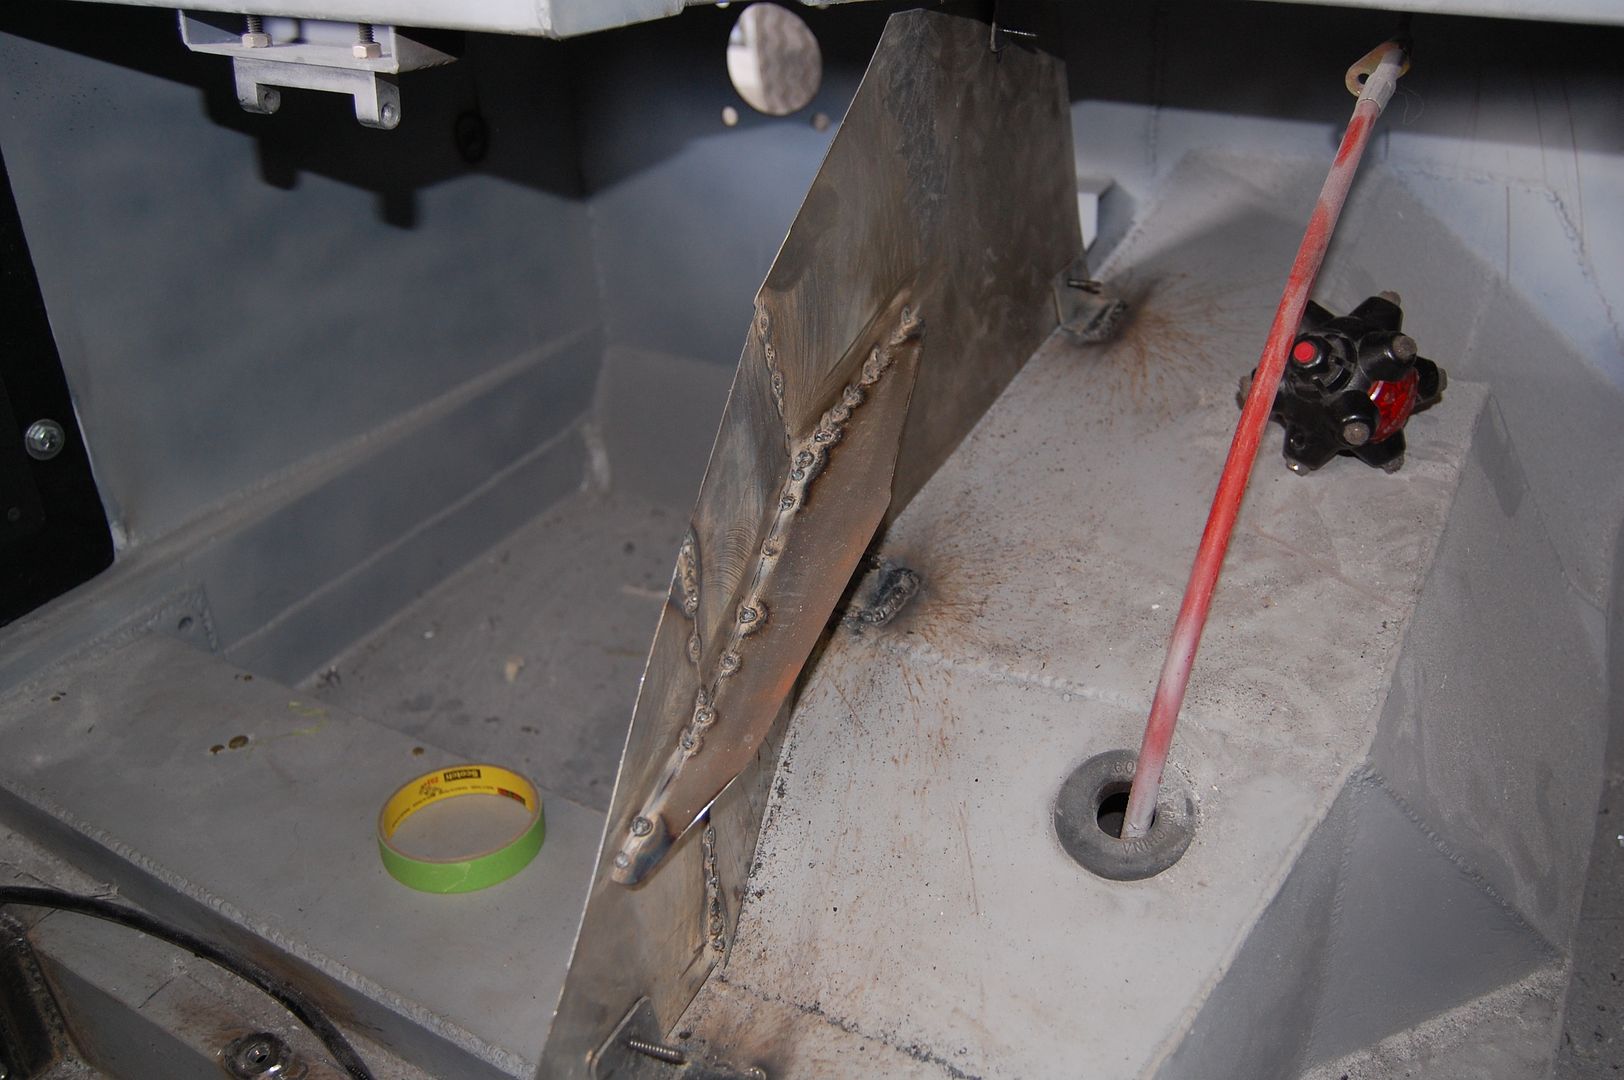
To mount them I created some little angle bracket/tabs that were welded to the chassis. Each of the panels would then screw to these tabs in some strategic locations. Each panel was tack welded together in many locations to create one single trim piece.
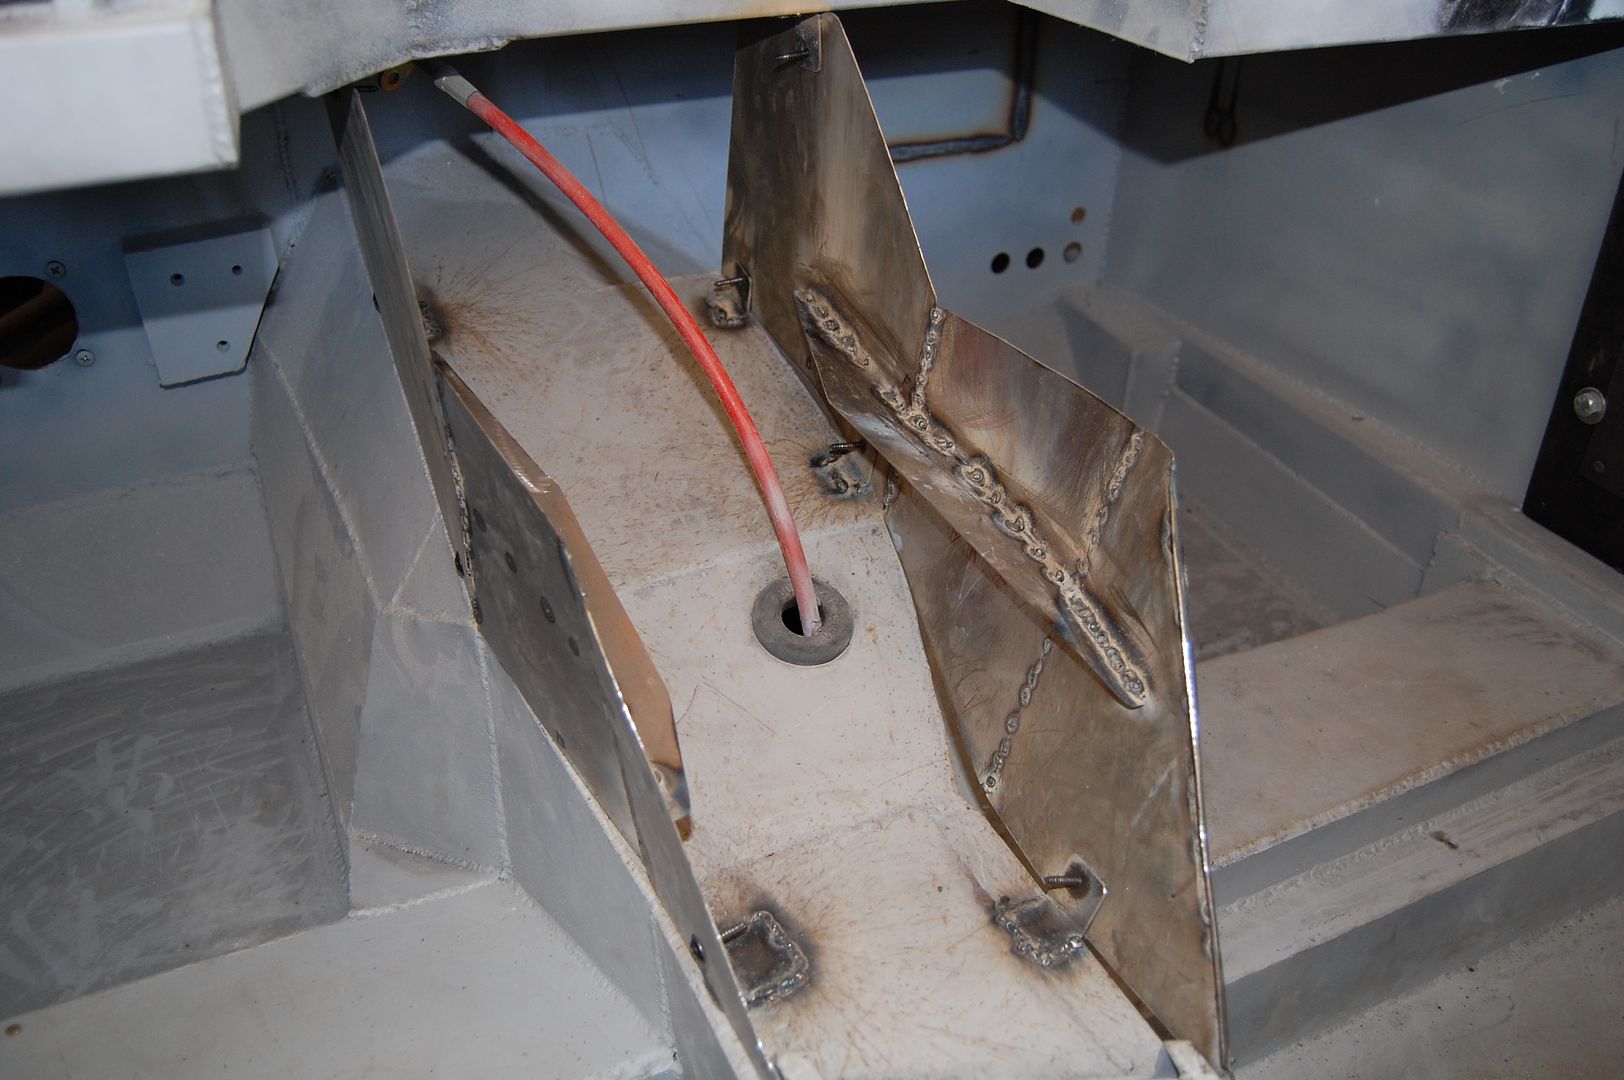
Once everything was located where I wanted it, and was test fitted with the dash face, I created a brace to go across the three pieces to ensure that they held their shape. Part of my test fitting was sticking my head down into the seating area of the car to see if I could see any gap between the dash and the footwell panels. In order to see a gap I had to basically stand on my head in the seating area 🙂
Just like the dash face and dash lid, these footwell panels will be covered in black vinyl.
I started to repeat the same process for the passenger side but then realized that it had a unique challenge. Since the dashboard sticks out more just before the passenger seat you could see underneath it a lot easier.
This meant I needed to extend the dashboard inward to lessen this gap. This involved creating a little form out of bristol board and aluminium foil before laying down some fiberglass matt/resin. Once everything cured I could trim off the excess and get started on the passenger footwell.
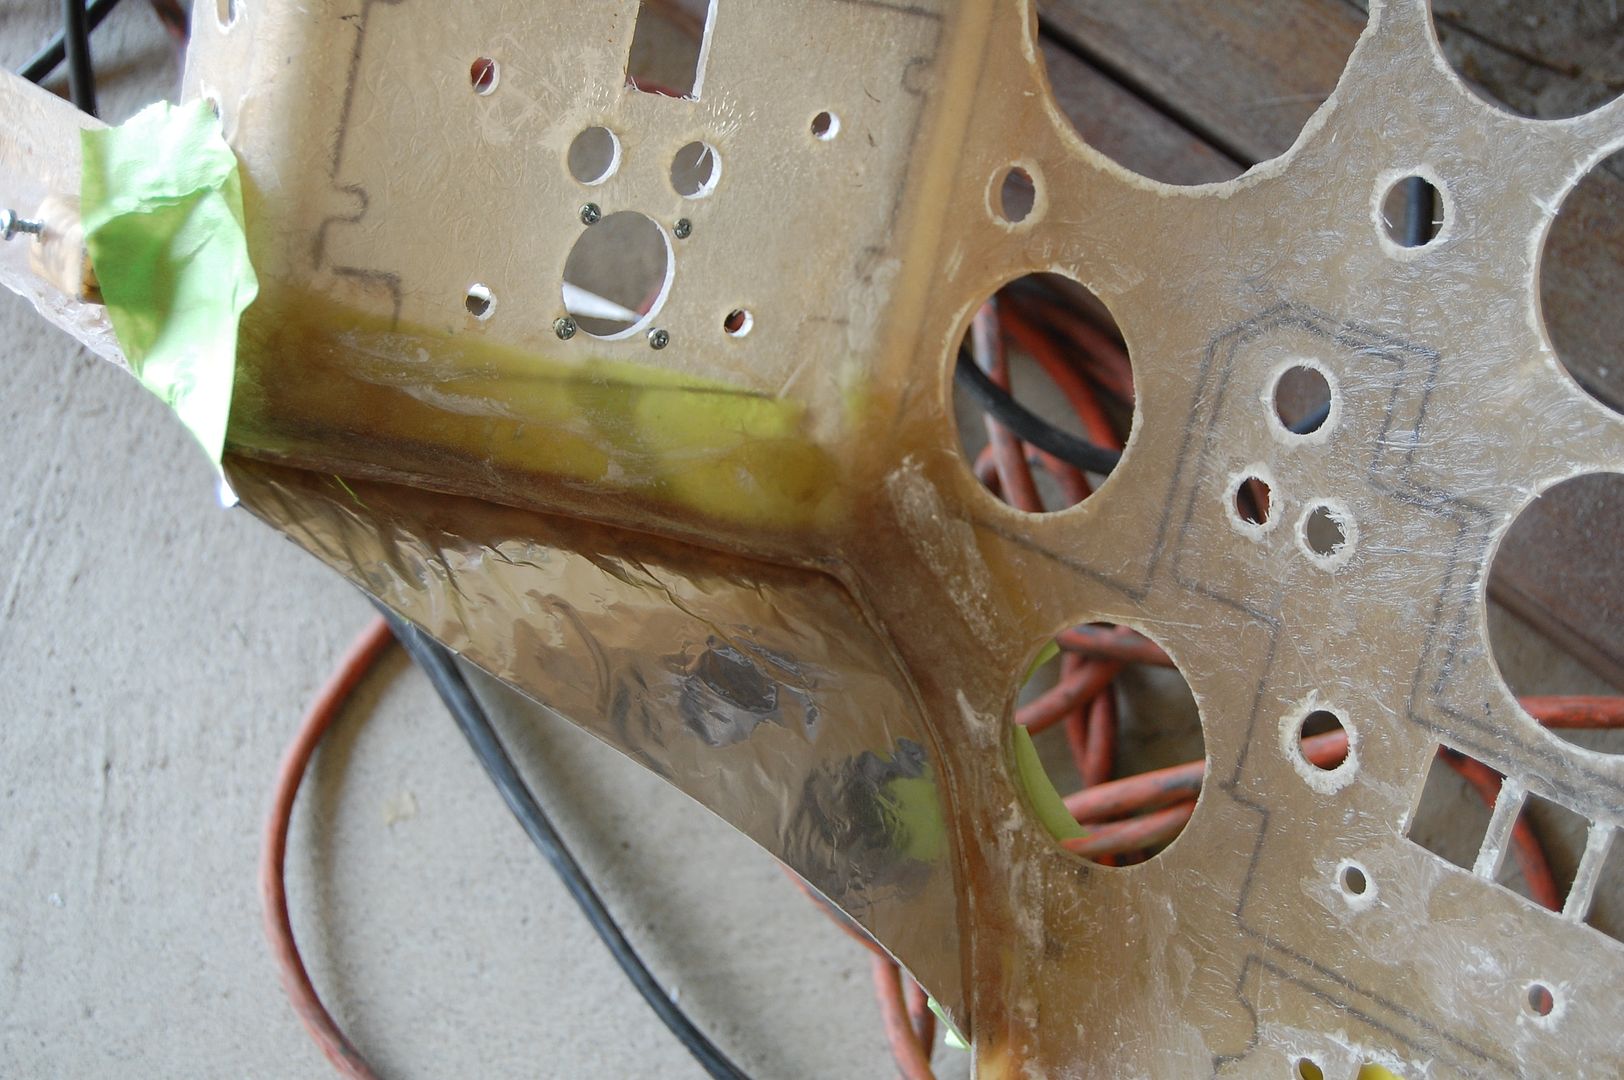
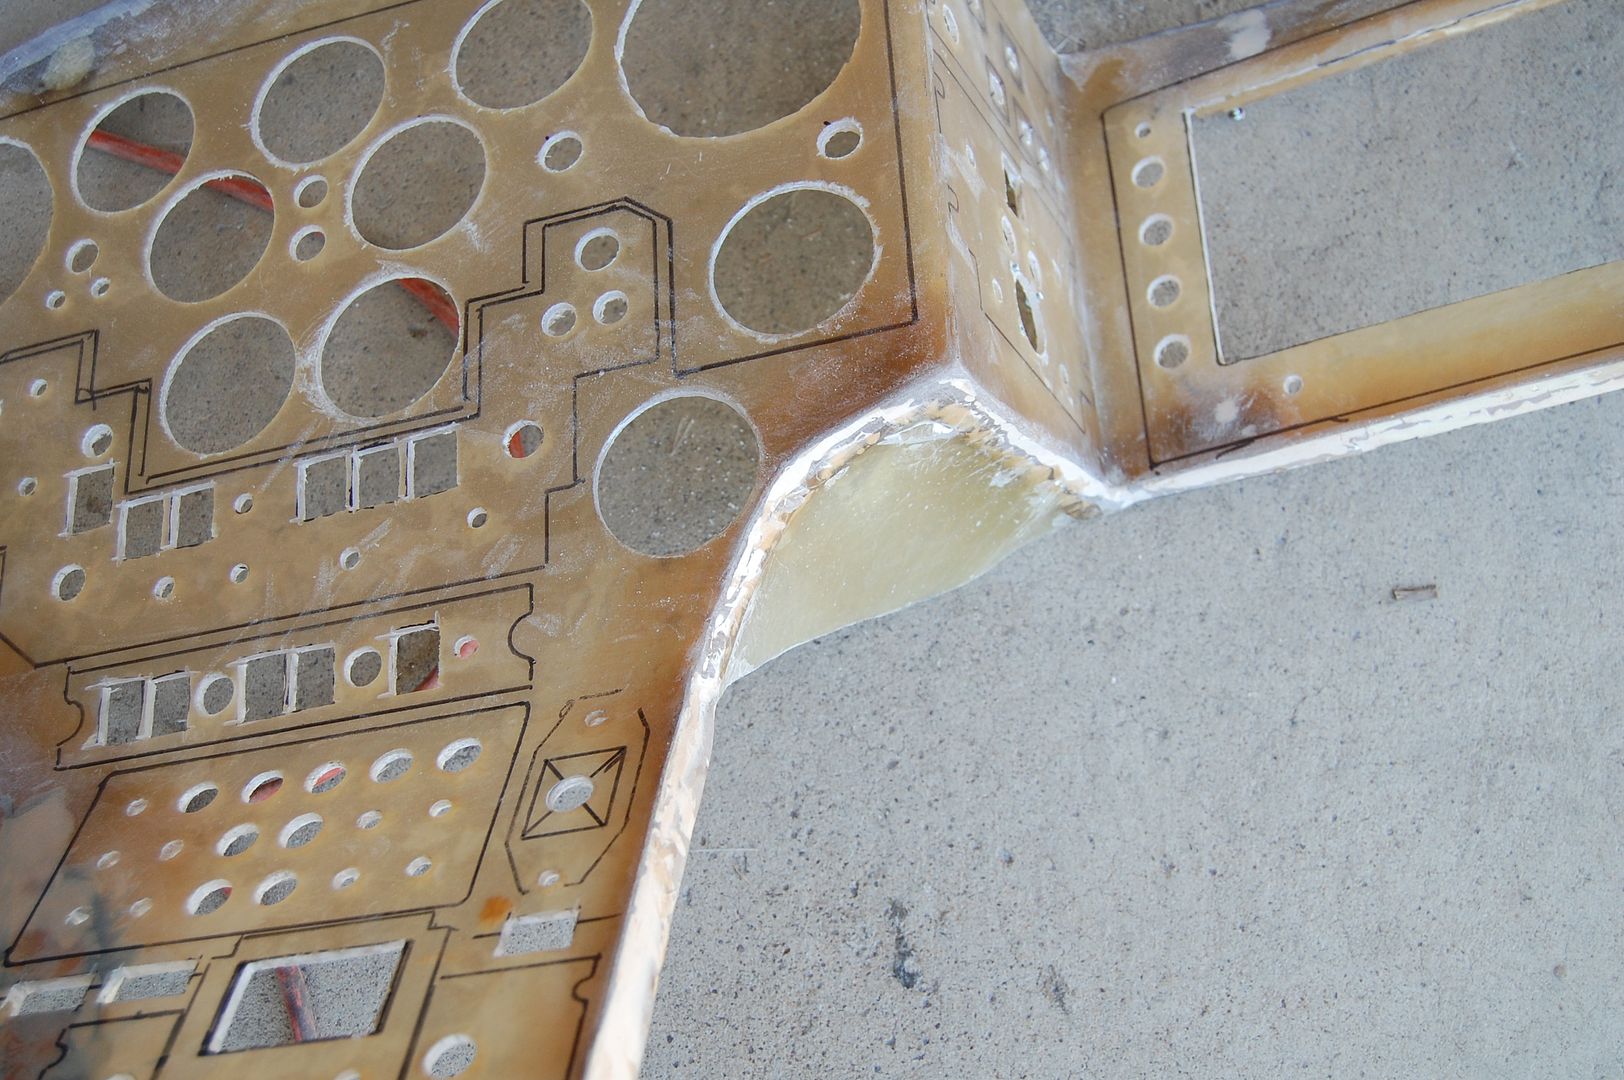
Since the center of the dashboard points towards the driver I needed to create a little strip of metal on the passenger side that would angle back towards the front of the car.
Both footwell panels are created out of 22 gauge steel and tuck up right under the edge of the dash face so that they overlap and create a gap-less seam.
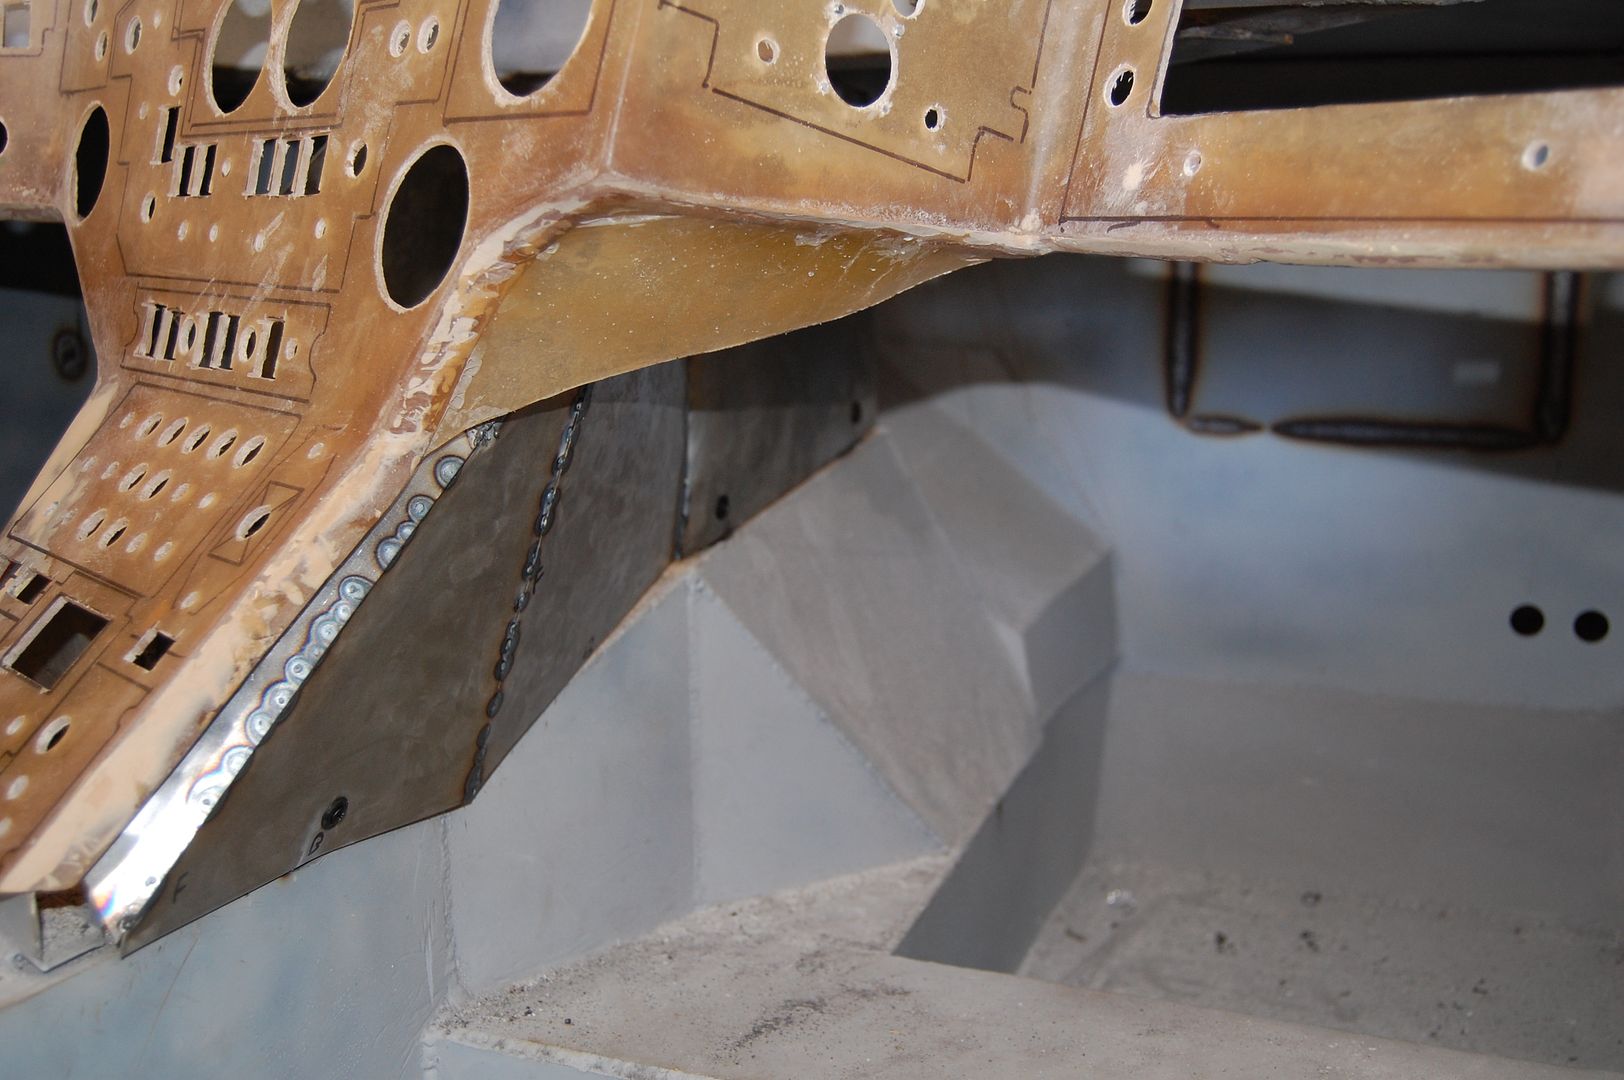
The same bracing technique was then applied along the back of the panel for the passenger side.
I’m really happy with how these turned out. They really give the dashboard a very nice finished look 🙂

The whole project looks great. You are doing a wonderful job.
Thanks for the kind words 🙂