
After a partial success on my exhaust tips yesterday, I started back to work after lunch today where I left off. With a little more investigation I realized that the steel that I used actually wasn’t too thin. There was some space behind the one 2×2 tubes allowing for front-to-back play.
I solved that problem by welding on a 1/8″ plate to the back of the 2×2 tube so that there wasn’t any wiggle room left. I also found that I needed a third anchor support. For this I welded on another tube just below the top support (seen in the picture below). This gave more vertical support and allows the mount to slide right into place and then the bolts simply secure everything so that nothing moves.

Here’s a look at the mounting fixture with the front plate welded.


I then bolted the mounting fixture to the chassis and lowered the car back down. Getting the fixture into position can be a little bit like playing Tetris. It’s a tight fit but there’s just enough wiggle room to get it where it needs to go.
Once the car was lowered I stacked up some wood under the exhaust tip to get it positioned where I wanted. Then I tack welded the backing plate of the exhaust tips to the fixture, unbolted everything from the chassis and then performed all of my finish welding.
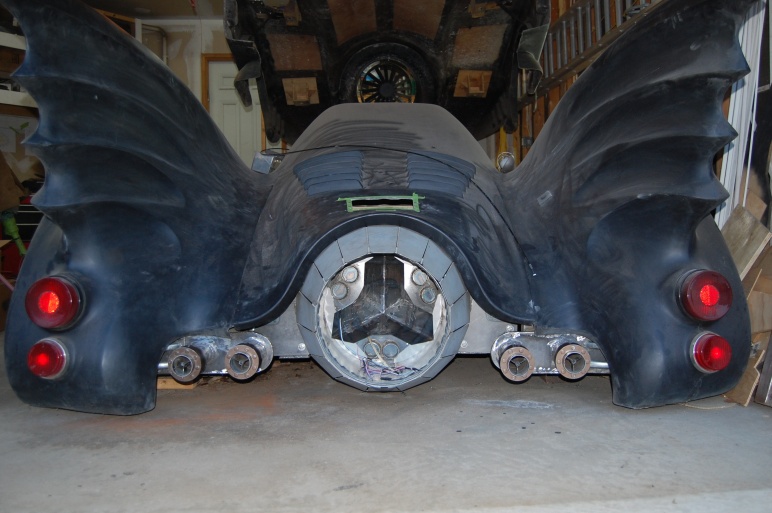
Below you can see the fixture bolted to the chassis with the wood propping up the exhaust tips and then a second photo of what it looks like after everything was finished and bolted back on the chassis.


All that was left to do was to repeat the steps on the passenger side. I managed to get the passenger side about 90% finished before I went inside for dinner but then headed back out after dinner to finish it off. This is when things went down hill 😦
What should have taken 30 minutes to finish ended up taking 2.5 hours. I was all the way to the point of tack welding on the exhaust tip backing plate to the fixture when I realized that I cross threaded two of the bolts holding it all on! I tried to back the two bolts out but both of the heads snapped off… Aaaaaaaaaahhhhhhhrrrrrrrggggggg!!!!!

I first tried to drill them out, but the bolts were made out of stainless steel. I can tell you that it isn’t a lot of fun trying to drill through 1″ of stainless steel. So I busted out my Dremel and cut out a square area around the nut insert, then cut two new pieces of steel to patch the holes and welded them in-place.
From there it was the usual routine of marking the holes, creating two new nut inserts with some nuts/washers, drilling out the holes and welding in the inserts. Once that was all done I was able to finally bolt everything back to the chassis.
I’m really happy with how they turned out, and they’re REALLY solid! Which is good, because you would be surprised to see what people do to your car when they’re looking at it.
I wouldn’t be surprised at all to watch someone use these exhaust tips as a step to go and sit up on the trunk lid of the car… yup…. people have climbed up on-top of my car before to take a photo. So it’s better to over build things than to watch them snap off when people do idiotic things 🙂


